Key Takeaways
A good Volvo 740 parts search starts with identifying the exact car, not simply the model name. Careful checking saves money, prevents unsafe mismatches, and makes installation far less frustrating.
- Confirm the model year, body style, engine, transmission, and drivetrain before ordering.
- Use VINs, OEM numbers, and measurements when catalog descriptions are unclear.
- Prioritize brakes, steering, suspension, cooling, and fuel-system repairs before cosmetic work.
- Compare new, used, OEM, and aftermarket parts by condition, fit, warranty, and total cost.
- Test-fit components methodically and keep records of what was installed.
Understanding Volvo 740 parts and compatibility
The Volvo 740 is old enough that two cars wearing the same badge may use different components. Production changes, engine swaps, previous repairs, and regional equipment can all affect fitment. A reliable search therefore begins with the car in front of you and its identifying numbers. That approach is more useful than trusting a broad “fits 740” label alone.
How model years affect parts fitment
Model-year changes can affect lights, trim, wiring, suspension details, emissions equipment, and interior fittings. Treat a catalog year range as a starting point rather than proof of compatibility. Compare the old part with the listing photograph, connector shape, mounting points, and dimensions before placing an order.
A replacement may fit mechanically while still differing in wiring or finish. When possible, record the production date and any mid-year changes shown in the vehicle documentation.
Differences between sedan, wagon, and trim levels
Sedans and wagons share much of their mechanical architecture, but their rear body panels, tailgates, cargo trim, weather seals, and some interior pieces are different. Turbo, naturally aspirated, diesel, and higher-equipment versions may also use different cooling, fuel, brake, or suspension components.
Do not assume that a trim badge tells the whole story. A car that has been modified over decades may carry parts from another version, so physical inspection remains worthwhile.
Checking engine, transmission, and drivetrain specifications
Write down the engine code, fuel system, transmission type, axle arrangement, and whether the car is turbocharged before shopping. These details narrow the search for belts, sensors, manifolds, clutch parts, driveshaft components, and differential service items. They also help explain why two apparently similar listings have different part numbers.
Photographs of the engine bay and transmission identification marks can be useful when asking a specialist for confirmation. Keep those images with your maintenance records so the same research does not have to be repeated.
Using VINs, casting numbers, and OEM part numbers
A VIN can establish the vehicle’s original configuration, while casting numbers and labels on the removed component may identify what is actually installed. OEM numbers are especially helpful when aftermarket catalogs use inconsistent descriptions. Search by the number, then verify dimensions and application notes rather than relying on a single result.
A simple parts record should include the number ordered, supplier, date, and any fitment notes. That paper trail becomes valuable during a long restoration or when the car changes hands.
Choosing engine and drivetrain components
The engine bay rewards careful, incremental work. Rubber hoses, seals, belts, sensors, and ignition components often age even when the engine still runs well. Before buying Volvo 740 parts, separate routine maintenance from symptoms that require diagnosis. Replacing several unrelated items at once can make a new fault difficult to trace.
Common replacement parts for the redblock engine
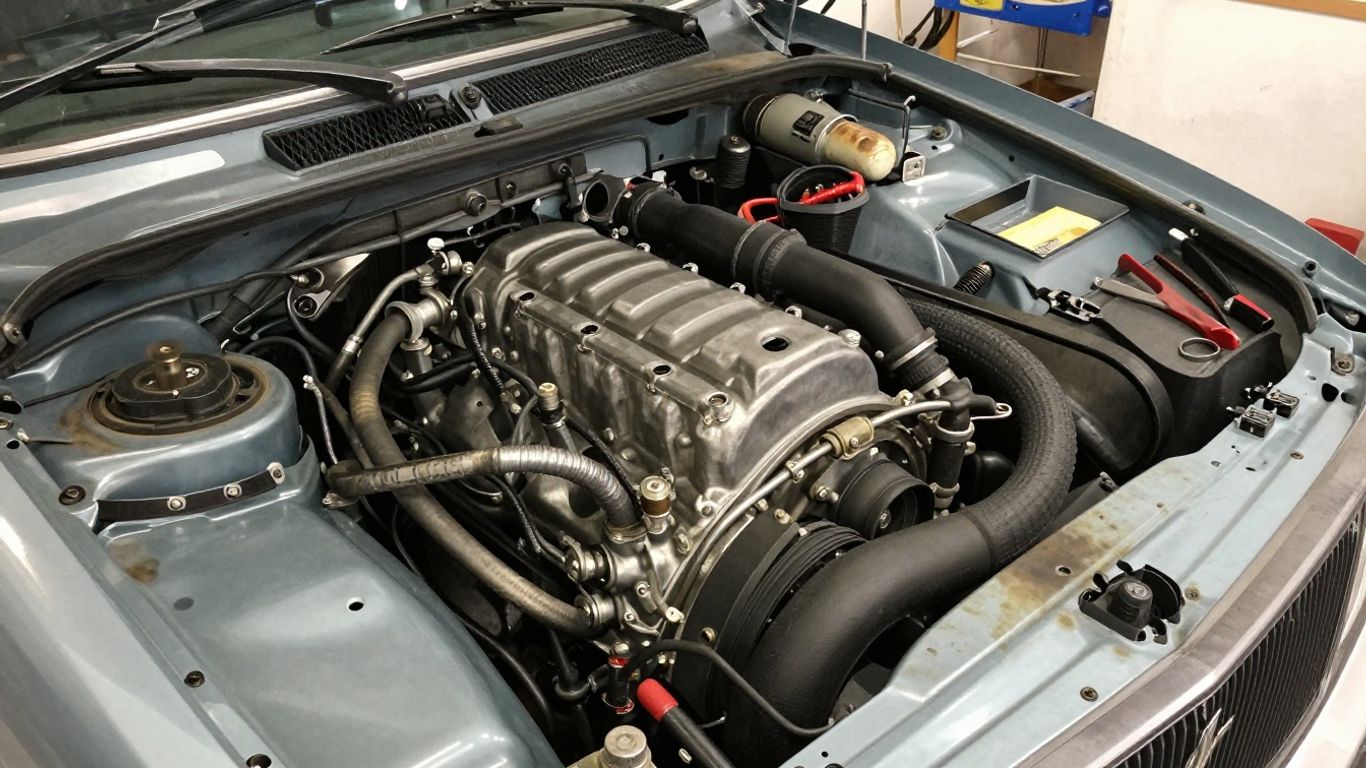
The familiar four-cylinder redblock can need ordinary service items such as belts, gaskets, filters, hoses, mounts, and seals. Inspect oil contamination, cracking, swelling, and looseness rather than replacing parts solely because of age. A cooling-system leak, for example, may come from a hose, clamp, radiator, water pump, or housing.
Clean mating surfaces and use the correct torque procedure during installation. Small leaks often become expensive when they are allowed to spread onto belts, wiring, or exhaust components.
Turbocharged versus naturally aspirated applications
Turbocharged and naturally aspirated engines can differ in intake plumbing, exhaust hardware, fuel delivery, sensors, and heat management. Confirm the engine configuration before ordering manifolds, hoses, injectors, control components, or gaskets. A part listed for a related engine is not automatically suitable for the complete system in your car.
If the car has been converted, document the conversion as its present configuration. That is usually more useful than ordering against the original VIN alone.
Selecting cooling, fuel, and ignition components
Cooling, fuel, and ignition systems should be approached as connected systems. Check hose routing, connector style, pressure requirements, plug type, and the condition of grounds before choosing replacements. A new component cannot compensate for a blocked line, corroded terminal, failing relay, or incorrect adjustment elsewhere.
For an efficient inspection, work through the systems in a fixed order:
- Check fluid level, leaks, and contamination.
- Inspect connectors, grounds, fuses, and visible wiring.
- Test pressure, voltage, or resistance with the correct procedure.
- Compare the removed component with the proposed replacement.
This sequence keeps diagnosis separate from guesswork. It also reduces the chance of installing a part that was never the source of the problem.
Matching clutch, transmission, driveshaft, and differential parts
Clutch and drivetrain components must match more than the engine family. Check transmission type, spline details, flywheel arrangement, driveshaft length, flange pattern, and axle ratio where relevant. Worn center supports, universal joints, mounts, and seals can mimic transmission trouble, so inspect the surrounding hardware before ordering a major component.
Measure or photograph the old parts when access allows. A specialist can often resolve uncertainty quickly when given clear identification marks and dimensions.
Finding suspension, steering, and brake parts
Suspension and braking work affects both safety and the way a 740 feels on the road. Age-related deterioration may be hidden behind intact-looking rubber or clean paint. A complete inspection should consider the condition of adjoining parts, not just the item that first attracted attention. Safety repairs deserve priority over cosmetic improvements.
Replacing worn shocks, springs, bushings, and mounts
Look for leaking dampers, sagging springs, cracked bushings, split dust boots, and movement at mounts. Replace components in matched pairs when the design and condition call for it, then check ride height and alignment. New shocks cannot restore correct geometry if worn bushings or bent hardware remain.
Before choosing a spring rate or damper type, decide whether the car is primarily a daily driver, touring car, or project vehicle. That use case will shape the right compromise between comfort and control.
Choosing brake rotors, calipers, pads, and hydraulic components
Brake parts should be matched by axle, rotor dimensions, caliper design, pad shape, and hydraulic arrangement. Inspect flexible hoses for cracking, calipers for seized pistons, and hard lines for corrosion. Flush contaminated fluid according to an appropriate service procedure and never treat a soft pedal as a parts-shopping problem alone.
After installation, confirm that the wheels rotate freely, the pedal remains firm, and there are no leaks. Bedding procedures and an alignment check may also be necessary depending on the work performed.
Diagnosing steering and front-end wear before ordering parts
Clunks, wandering, uneven tire wear, and steering looseness can come from several locations. With the vehicle safely supported, inspect tie-rod ends, ball joints, bushings, wheel bearings, mounts, and fasteners. Have an assistant move the steering while you observe play at each joint.
Diagnosis before purchase is the best defense against replacing the wrong component. Record where movement occurs and compare both sides before choosing parts.
Balancing original ride quality with performance upgrades
Performance springs, firmer dampers, thicker anti-roll bars, and modern bushings can change the car’s character. They may also increase noise, reduce compliance, or expose weakness in other components. Choose upgrades as a matched package and confirm that wheel clearance, alignment range, and brake balance remain appropriate.
For an original-feeling restoration, quality standard-replacement parts are often the more coherent choice. A modest improvement in condition can matter more than an aggressive specification.
Restoring the Volvo 740 body and interior
Body and interior restoration is partly a search for correct shapes, textures, and finishes. Some pieces are shared across the 700 series, while others are specific to a body style or production period. Photograph every trim location before disassembly and label fasteners as they come off. This turns reassembly into a controlled process instead of a memory test.
Sourcing exterior trim, lights, bumpers, and weather seals
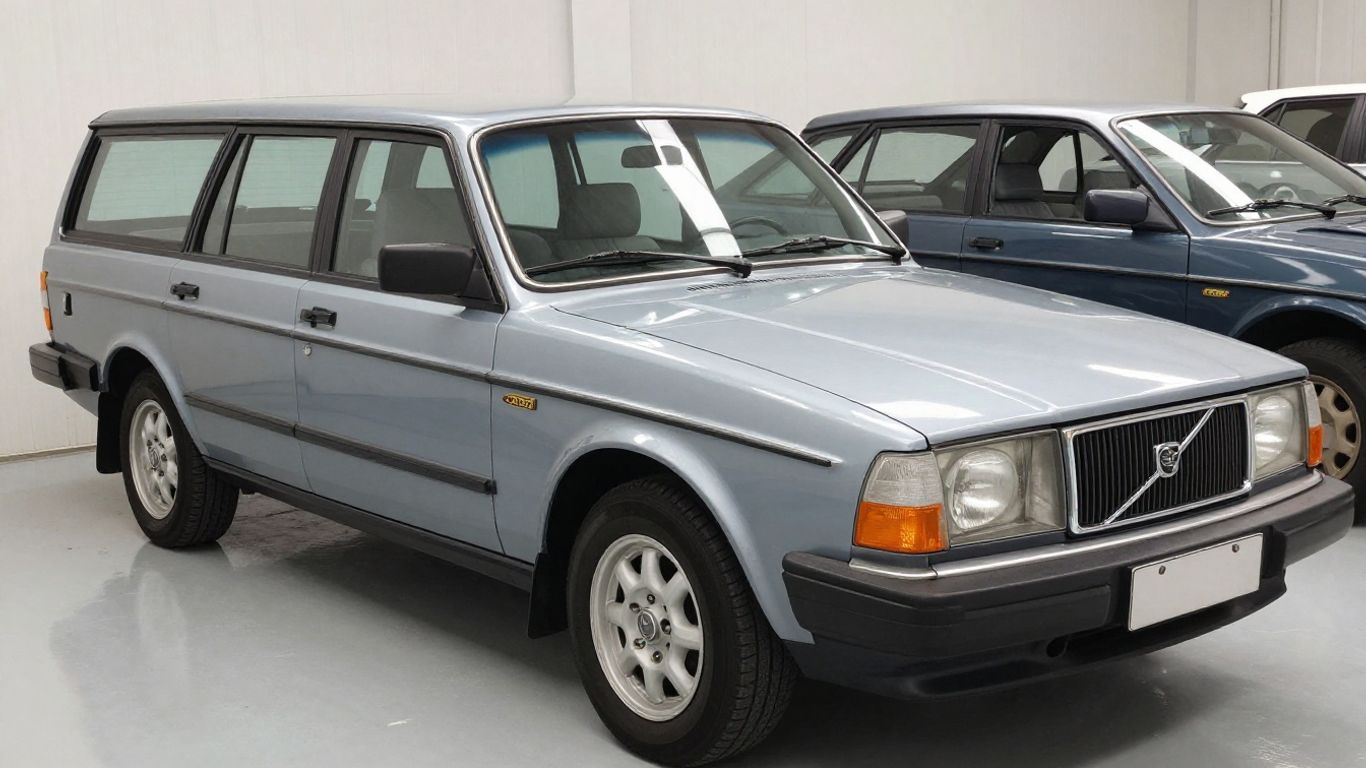
Exterior components should be compared for mounting tabs, lens pattern, finish, and side-specific details. Weather seals deserve particular attention because a close-looking seal may still allow water into the cabin or cargo area. For lights, verify connector type and adjustability as well as the visible housing.
Used trim can be worthwhile when its clips and surface are intact. Ask for close photographs of corners, attachment points, and areas that are normally hidden after installation.
Repairing rust around common problem areas
Inspect lower doors, wheel arches, rocker panels, floor edges, hatch areas, windshield surrounds, and seams where moisture can collect. Surface rust and structural corrosion require different repair decisions. Remove enough coating to understand the full affected area before buying patch panels or paint.
A durable repair depends on cutting back compromised metal, controlling moisture, and protecting the repaired area. Covering corrosion with filler may improve appearance briefly while leaving the underlying problem in place.
Replacing seats, dashboard components, carpets, and door panels
Interior parts should be assessed for mounting hardware, foam condition, fabric match, and sun damage. Dashboard cracks may be difficult to hide, while seats and carpets can often be refreshed if their frames remain sound. Store removed clips and screws in labeled bags because small interior fasteners are easy to confuse.
Clean replacement pieces before installation and test switches, speakers, seat mechanisms, and illumination while access is easy. It is frustrating to reinstall a panel only to remove it again for one forgotten connector.
Matching interior parts across different 740 model years
Dashboard vents, instrument faces, door cards, seat patterns, console pieces, and switchgear may vary by year or equipment level. Compare color, grain, connector layout, and mounting points rather than choosing by appearance alone. A complete donor interior can sometimes be easier to match than several unrelated loose pieces.
Keep original hardware whenever it is serviceable. Even when a replacement looks correct, the original brackets and clips may provide the most reliable fit.
Selecting electrical and climate-control components
Electrical faults often travel through shared grounds, aging connectors, and modified wiring. Climate-control problems can involve electrical, mechanical, and refrigerant-related causes at the same time. Begin with a wiring diagram and a clear symptom description. Avoid replacing relays or control units without checking power, ground, and the load they operate.
Troubleshooting charging, starting, and ignition systems
Test battery condition, terminal cleanliness, grounds, alternator output, starter operation, and ignition signals in a logical order. A slow crank can result from a weak battery, poor cable connection, worn starter, or excessive resistance. Likewise, a no-start condition should be separated into fuel, spark, timing, and compression checks.
Write down measured values and the conditions under which the fault occurs. Intermittent problems become much easier to discuss with a technician when they are described precisely.
Replacing relays, fuses, wiring, and dashboard switches
Use the correct fuse rating and compare relay pin layouts before installation. Inspect overheated sockets, loose terminals, brittle insulation, and aftermarket splices. Dashboard switches should be checked for both mechanical operation and electrical continuity, since a switch can feel normal while failing internally.
Label disconnected plugs during restoration and photograph routing before removing harness sections. Good documentation prevents accidental reversal and helps preserve original wiring.
Finding compatible heating and air-conditioning parts
Heating and air-conditioning components require careful identification because hoses, controls, fans, valves, condensers, and compressors may vary by system. Determine whether the fault is airflow, temperature control, electrical operation, or refrigerant-side performance before purchasing parts. Refrigerant work should follow applicable safety and service requirements.
When comparing repair with replacement in any cooling system, a repair or replacement guide can provide a useful decision-record framework, although a vehicle climate system still needs vehicle-specific diagnosis. Do not substitute a general facilities guide for the correct automotive procedure.
Upgrading lighting and audio equipment without harming originality
Modern bulbs, head units, speakers, and auxiliary power solutions can improve usability, but installation should be reversible where possible. Check load, heat, polarity, grounding, and physical clearance before altering the harness. Keep removed original components labeled so the car can be returned to its earlier specification.
For research-heavy projects, even a basic keyword research guide is a reminder to compare search terms carefully; in parts catalogs, exact numbers and application notes matter more than broad phrases.
Comparing new, used, OEM, and aftermarket Volvo 740 parts
There is no single best source for every component. A new seal, used trim piece, reproduction panel, and rebuilt caliper each have different risk profiles. Compare the part’s function, safety importance, availability, and ability to inspect it before purchase. A low price is not a saving if the part must be removed and replaced again.
When genuine OEM components are worth the higher cost
Original-equipment parts can be especially attractive for safety-related hardware, unusual fittings, sensors, clips, seals, and components where dimensions are difficult to verify. Their value depends on current stock, age, storage conditions, and the credibility of the seller. “OEM” should still be checked against a part number and application.
For common wear items, a well-made alternative may be perfectly sensible. The decision should follow evidence rather than the label alone.
Evaluating aftermarket quality and manufacturer reputation
Compare material, dimensions, warranty terms, technical documentation, and user reports that include actual fitment details. Avoid listings with vague photographs or contradictory vehicle applications. A reputable manufacturer should provide enough information to identify the component and handle a defective shipment.
Read the fine print on kits. Some include hardware, seals, or sensors while others show them only as illustrative accessories.
Inspecting used parts for wear, damage, and hidden defects
Used components are most useful when their failure modes are visible and their condition can be inspected. Look for cracks, bent mounting points, corrosion, stripped threads, heat damage, and missing clips. Ask whether the part was tested, removed from a running vehicle, or sold strictly as-is.
A used body panel may be a strong choice even with light cosmetic work, while a mystery electrical module may carry more risk. Match the inspection standard to the part’s consequence if it fails.
Deciding between reproduction parts and salvage-yard finds
Reproduction parts offer predictable availability but may differ in texture, dimensions, or finish. Salvage-yard finds can preserve original details and hardware, though they may require cleaning or refurbishment. For scarce trim and interior pieces, a sound used original is often worth considering.
A broad Volvo 740 parts catalog can help establish the categories and terminology used by sellers. Cross-check every result against the individual vehicle rather than assuming the catalog’s broad model coverage settles fitment.
Buying and installing Volvo 740 parts with confidence
A successful purchase includes more than finding a part at an attractive price. You also need a clear return path, realistic shipping expectations, and enough information to verify the component when it arrives. Keep the old part until the new one is installed and tested. That habit can prevent an avoidable delay when a catalog description turns out to be incomplete.
Comparing specialist retailers, marketplaces, and salvage yards
Specialist retailers may provide better application information, while marketplaces can expose rare inventory from many sellers. Salvage yards are useful for original trim, brackets, glass, and other discontinued pieces. Compare photographs, seller knowledge, packaging, and return terms rather than judging only by price.
Resources such as Classic Volvo Restoration, Nordicar, used Volvo parts, and Volvo 740 upgrades illustrate different ways a buyer may organize a search across restoration, specialist, used, and upgrade categories. Treat each listing as a lead that still requires verification.
Confirming stock, return policies, and shipping considerations
Ask whether an item is physically in stock, backordered, discontinued, or sourced after purchase. Confirm whether returns exclude electrical parts, opened seals, special orders, or installed components. Large body panels and fragile trim need packaging details and a plan for documenting shipping damage.
Save the listing, invoice, correspondence, and photographs of the package. Those records make a return or fitment question much easier to resolve.
Creating a restoration budget and prioritizing safety repairs
Divide the project into running, stopping, steering, weatherproofing, and appearance. Put brakes, tires, fuel leaks, structural rust, lighting, and steering faults ahead of cosmetic upgrades. Add a contingency for seized fasteners, missing hardware, machine work, and shipping.
A simple budget table can keep priorities visible:
| Project area | First question | Typical evidence | Priority |
|---|---|---|---|
| Brakes | Is stopping performance safe? | Leaks, wear, pedal feel | High |
| Cooling | Can the engine hold temperature? | Leaks, pressure, overheating | High |
| Suspension | Is control and alignment sound? | Play, sagging, uneven wear | High |
| Interior | Is the cabin usable and dry? | Water entry, broken trim | Medium |
The table is not a substitute for inspection, but it helps prevent a tempting cosmetic purchase from displacing a necessary safety repair. Revisit the budget whenever a new fault changes the project’s order.
Preparing parts for installation and verifying the final fit
Clean mating surfaces, compare old and new components, inspect supplied hardware, and read the installation instructions before applying force. Test electrical parts before closing panels and lubricate or torque fasteners according to the relevant procedure. After installation, check for leaks, interference, warning lights, unusual noise, and correct operation.
A short road test should be followed by another inspection, especially after brake, suspension, cooling, or drivetrain work. Keep the removed part until the repair has proved itself.
Conclusion
Finding the right Volvo 740 parts is a process of identification, inspection, comparison, and careful installation. When each purchase is tied to the car’s actual specifications and each repair is tested before moving on, even a complicated restoration becomes a series of manageable decisions.
Frequently Asked Questions
Are Volvo 740 parts interchangeable across all model years?
No. Many components cross over, but model-year changes, body style, engine, equipment, and previous modifications can affect fitment. Verify the specific application before ordering.
How can I identify the correct part for my Volvo 740?
Use the VIN, engine and transmission information, OEM or casting numbers, measurements, photographs, and connector or mounting details. Comparing the removed component with the listing is also helpful.
Should I buy new or used parts for a restoration?
Choose based on function and condition. New parts are usually preferable for safety and wear items, while used originals can be valuable for trim, brackets, and discontinued interior pieces.
What should I repair first on a project Volvo 740?
Address structural rust, brakes, tires, steering, suspension, fuel leaks, cooling problems, and unsafe wiring before cosmetic improvements. The exact order depends on the inspection results.
Are aftermarket parts reliable for an older Volvo?
Some are well made and some are not. Compare manufacturer information, dimensions, warranty coverage, application notes, and credible fitment feedback before buying.
How do I avoid ordering the wrong electrical component?
Check the part number, connector, pin layout, voltage requirements, fuse rating, and vehicle application. Diagnose power and ground first rather than replacing a module based only on a symptom.
What should I do if a replacement part does not fit?
Stop before modifying the vehicle or forcing the part into place. Photograph the mismatch, compare numbers and dimensions, contact the seller, and use the return process while keeping the original component available for reference.