

Key Takeaways
Volvo brake calipers are central to consistent, controlled braking, but their design and fitment vary widely across models. Correct identification, careful inspection, and proper installation matter more than appearance alone.
- Match the caliper to the exact vehicle, axle, rotor, and mounting arrangement.
- Floating and fixed designs use different piston and hardware layouts.
- Uneven pad wear, pulling, leaks, and overheating deserve prompt attention.
- Replacement work includes fluid management, correct torque, bleeding, and leak checks.
- Clean hardware, sound hoses, fresh fluid, and proper bedding support long service life.
Understanding how Volvo brake calipers work
A brake caliper converts hydraulic pressure into clamping force at each wheel. It sits around the rotor and positions the pads so friction can slow the vehicle. Although the basic principle is simple, piston arrangement, sliding hardware, and mounting details vary between applications. Understanding those relationships makes later diagnosis much less guesswork.
The caliper’s role in the braking system
When the driver presses the pedal, brake fluid carries pressure through the hydraulic system to the caliper. The caliper piston moves a pad against the rotor, while the opposing pad is drawn into contact through the caliper body or another piston. This action turns vehicle motion into heat at the friction surfaces. The caliper must remain secure while allowing the pads to move in a controlled way.
Floating versus fixed caliper designs
A floating, or sliding, caliper generally uses one or more pistons on one side and moves on guide pins to apply both pads. A fixed caliper stays in one position and uses pistons on opposing sides of the rotor. Neither design is automatically better for every vehicle; the original layout is selected around available space, braking demand, wheel clearance, and cost. Replacement parts must preserve the intended movement and mounting geometry.
How pistons, pads, and rotors work together
The piston does not touch the rotor directly. It presses the inner pad, while the caliper body or opposing pistons bring the outer pad into contact. The pads then create friction against both rotor faces, and the rotor carries that heat away through its mass and airflow. A clean, square contact pattern helps the driver receive predictable pedal feedback.
Why caliper condition affects braking performance
A piston that cannot retract properly may keep a pad against the rotor, while a seized guide pin can prevent the opposite pad from applying evenly. Either condition can create heat, noise, accelerated wear, or a vehicle that feels reluctant to roll. Even pad contact matters because braking force must be shared consistently across the rotor. A caliper that looks acceptable externally can still have internal corrosion or restricted movement.
Choosing the right Volvo brake calipers
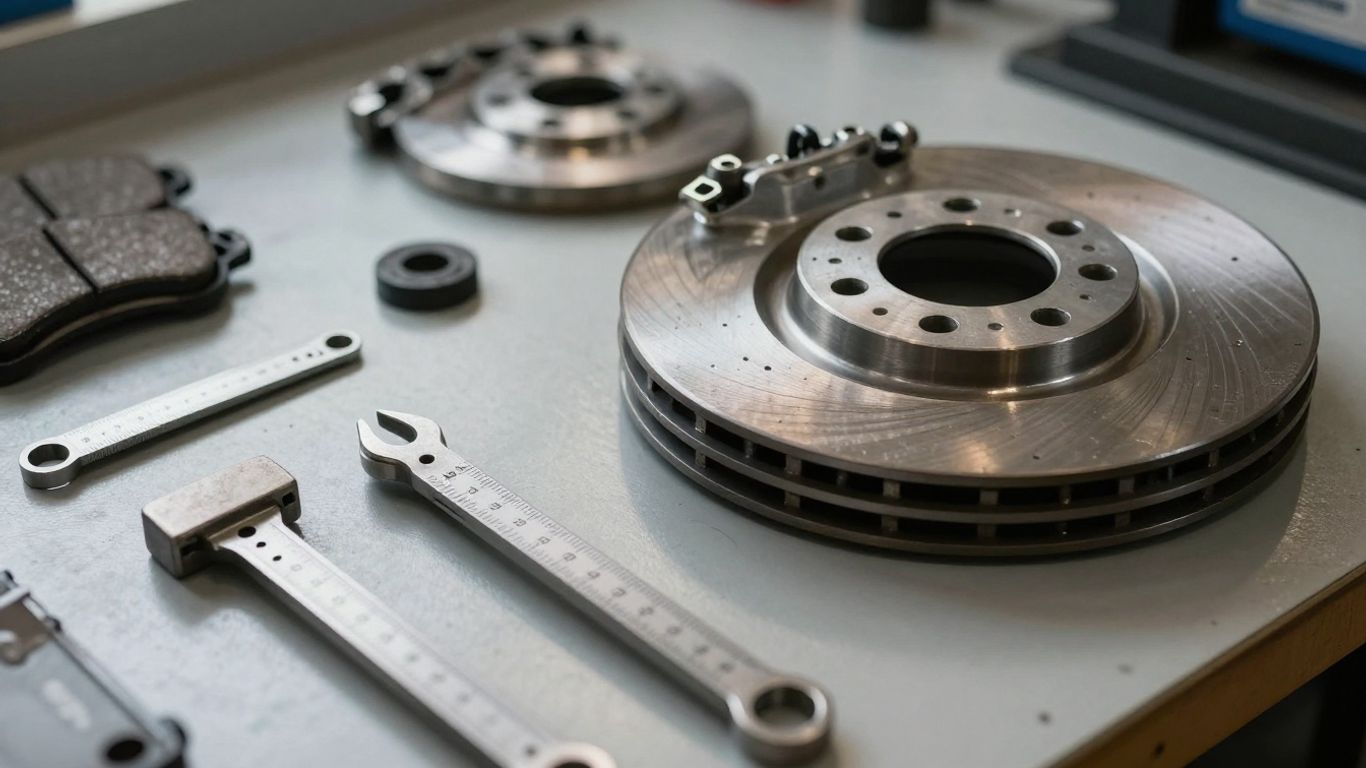
Selecting Volvo brake calipers starts with identification, not with a visual resemblance in a parts listing. Model year, engine, trim, axle, brake package, and production changes can all affect compatibility. The same vehicle name may appear with different rotor dimensions or mounting details. Before ordering, compare the original part and the vehicle information with a reliable catalog or repair reference.
Matching calipers to the exact Volvo model and year
Use the vehicle identification number when possible, then confirm the front or rear position and left or right side. Check whether the vehicle has standard or optional brakes, especially if the wheels, rotors, or suspension have been changed. A parts listing that names only a broad model range is not enough evidence by itself. The goal is to match the complete brake system, not merely the caliper’s silhouette.
Comparing OEM, remanufactured, and aftermarket options
An original-equipment replacement can offer the closest match to the existing hardware, while a remanufactured unit may reuse a suitable core after cleaning, inspection, and rebuilding. Aftermarket options vary, so examine the supplier’s specifications, included hardware, piston arrangement, finish, and warranty. A low price is not useful if the bleeder location, hose connection, or bracket differs. For a broader view of Volvo-specific and universal choices, this S40 rear-caliper discussion illustrates why intended application matters.
Checking front and rear brake compatibility
Front and rear calipers do different work and are not interchangeable simply because they share a brand or general shape. Rear assemblies may interact with a parking-brake mechanism, while front assemblies often handle greater thermal demand. Confirm rotor thickness, pad shape, hose routing, and any electronic or mechanical parking-brake arrangement. Replacing one axle should also prompt a comparison of pad and rotor condition on the opposite side.
Verifying piston count, mounting points, and rotor size
Before installation, compare piston count, bore arrangement, bolt spacing, bracket shape, rotor diameter, rotor thickness, and wheel clearance. These measurements help catch a catalog error before brake fluid is opened. A performance-oriented option such as Brembo Xtra is described as offering dedicated components for specific Volvo vehicles, but the same principle still applies: verify the exact vehicle and brake combination rather than relying on appearance.
For a quick pre-order check, write down these details:
- Vehicle model year and identification number.
- Front or rear axle and left or right position.
- Rotor diameter, thickness, and mounting arrangement.
- Piston count, hose connection, and bleeder location.
That short record gives a parts counter or technician useful information and reduces the chance of ordering a visually similar but incompatible unit.
Volvo brake caliper materials and performance options
Caliper construction affects weight, heat handling, corrosion behavior, and manufacturing cost. Material alone does not determine braking quality; piston seals, pad compound, rotor design, and calibration matter just as much. A standard replacement is usually the sensible choice for normal commuting when the original brake system is healthy. More specialized equipment should be selected for a clear use case and checked as a complete system.
Cast iron and aluminum caliper construction
Cast iron is commonly valued for strength, durability, and cost-effective production, though it is heavier and can develop visible corrosion. Aluminum can reduce unsprung weight, but its design, coating, and hardware still determine how it performs in service. Neither material excuses neglect around seals, guide pins, or fluid passages. The best comparison is between complete, correctly matched assemblies rather than material labels alone.
Standard calipers for everyday driving
For commuting, family use, and ordinary highway driving, a standard caliper that matches the factory rotor and pad specification is generally the most straightforward route. It preserves familiar pedal behavior and avoids introducing clearance or balance questions. Good-quality seals and smooth hardware are more valuable than a dramatic appearance upgrade. The rest of the brake system should remain compatible with the chosen unit.
Upgraded calipers for towing or spirited driving
Drivers who tow, descend long grades, or use a vehicle aggressively may need greater thermal capacity, more consistent pad control, or improved pedal feel. An upgrade should be assessed alongside rotor size, pad compound, brake lines, wheel clearance, and hydraulic balance. For example, the ELEVATE Six-Piston Kit is described for the Volvo C30 with stock 300 mm discs, performance street pads, braided lines, and heat shields. That documented application does not make the kit suitable for every Volvo.
Volvo-specific calipers versus universal designs
A vehicle-specific caliper is designed around known mounting points, hose routing, rotor dimensions, and wheel space. A universal design may require custom brackets or other fabrication and is usually better suited to a carefully engineered custom build. Appearance accessories are a separate matter: Leprecon Plus describes caliper covers for selected Volvo models, but a cover is not a substitute for a functioning caliper or a performance upgrade. Keep cosmetic and hydraulic decisions separate.
Signs that Volvo brake calipers need attention
Brake problems often develop gradually, with a change in wheel temperature, pad wear, or pedal feel before a warning becomes dramatic. Comparing both sides of the same axle is useful because they experience similar conditions. Pay attention to changes after rain, winter driving, or a long descent. If braking feels unsafe, stop driving and arrange a professional inspection.
Uneven brake pad wear
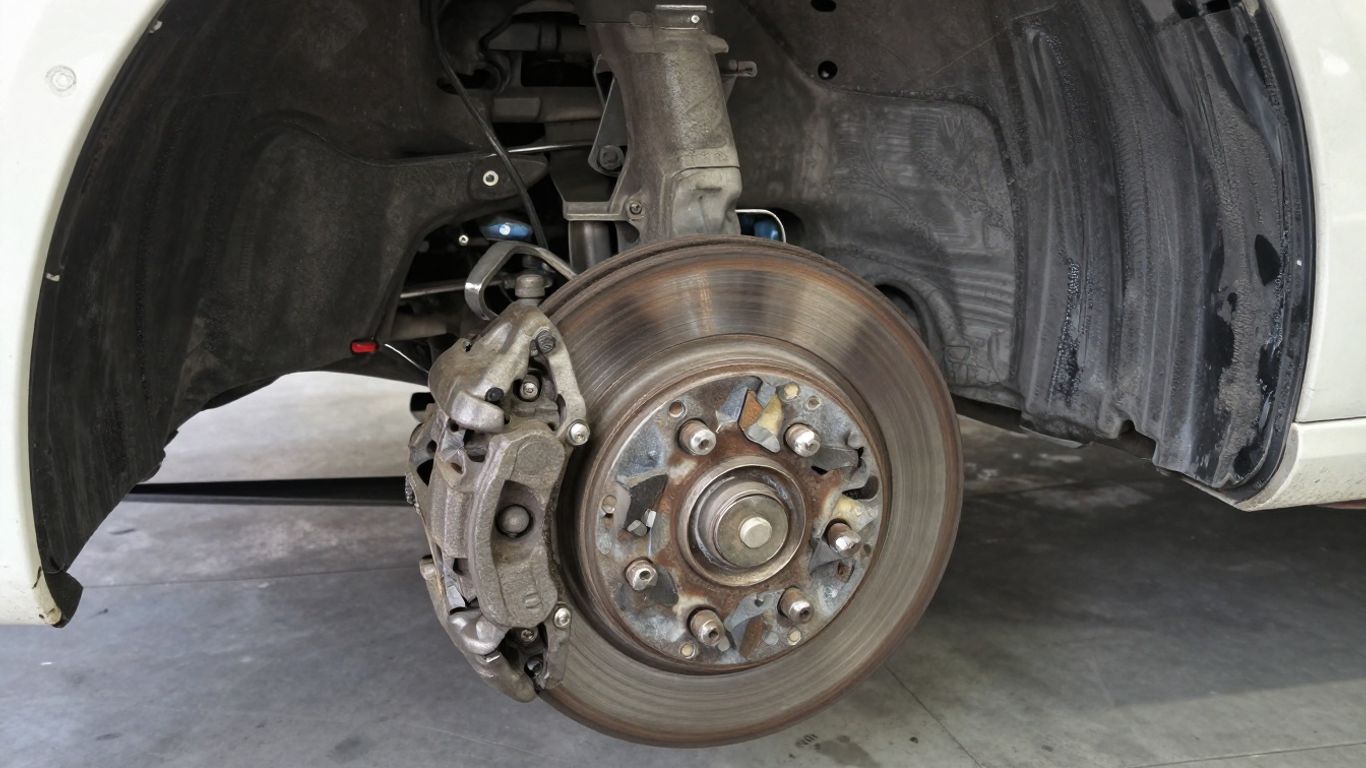
One pad that is much thinner than its partner can point to restricted sliding movement, a piston that is not releasing, or incorrect hardware placement. Tapered wear may suggest a guide-pin or caliper alignment problem. The rotor surface should be inspected at the same time, since pad wear and rotor condition influence each other. Replacing only the visibly worn pad does not correct the underlying cause.
Pulling, vibration, or poor braking response
A vehicle that pulls during braking may have unequal caliper action, but tire condition, suspension components, alignment, and hydraulic problems can create similar sensations. Vibration may come from rotor thickness variation, runout, wheel mounting, or pad deposits rather than the caliper itself. A soft pedal usually points toward air, fluid, hose expansion, or another hydraulic concern. Diagnosis should compare symptoms with physical evidence.
Sticking pistons and seized guide pins
A sticking piston can leave a pad dragging, while seized guide pins can stop a floating caliper from centering over the rotor. Common clues include one unusually hot wheel, a burning smell, squealing, or rapid pad wear on one side. Do not force a damaged pin or reuse torn boots without inspection. Corrosion under a seal or boot often means the component needs rebuilding or replacement.
Brake fluid leaks, corrosion, and overheating
Fluid around the hose connection, bleeder, piston seal, or caliper body is a serious warning because hydraulic pressure can fall without much notice. Heavy rust can interfere with pad movement and hardware seating. Blue or heavily discolored rotor surfaces may indicate excessive heat, though the cause still needs to be found. A replacement caliper should be paired with fresh sealing washers or specified fittings where required.
A useful visual reference is painted metal surfaces, not because brake work is cosmetic, but because cleaning, degreasing, sanding, priming, and corrosion prevention all reinforce the broader lesson: preparation affects the durability of a finished surface.
How to diagnose Volvo brake caliper problems
Diagnosis should move from simple observation to targeted testing. Begin with the vehicle safely supported and the brakes cool enough to inspect. Look for differences between sides, then consider whether the symptom changes with pedal application, parking-brake use, or wheel rotation. Avoid replacing a caliper solely because it is the most visible part.
Inspecting the caliper, pads, and rotor
Check the caliper body, dust boots, guide-pin boots, bleeder, hose connection, pad edges, and rotor faces. Measure pad thickness and look for tapering, cracks, glazing, or contamination. With the wheel removed, confirm that the pads can move correctly in their abutments without excessive looseness. Any inspection must follow safe lifting and wheel-removal procedures.
Testing for uneven hydraulic pressure
A technician can compare pressure at the relevant hydraulic circuits with suitable gauges and procedures. Pressure that fails to build or release may point toward a restriction, master-cylinder issue, hose problem, or caliper fault. Do not open a brake line casually: fluid contamination, air entry, and damaged fittings can create a second problem. Hydraulic testing is most useful when paired with temperature and wear comparisons.
Distinguishing caliper faults from other brake issues
Wheel bearings, tires, alignment, suspension bushings, ABS components, hoses, and rotors can mimic caliper symptoms. A vibration at a particular speed is not automatically a caliper defect, and a pulling complaint may begin outside the brake system. Compare road symptoms with inspection findings and service history. This approach prevents a new caliper from masking a problem elsewhere.
When professional diagnosis is necessary
Seek qualified help when there is a leak, a soft pedal, severe overheating, damaged brake-line fittings, suspected ABS involvement, or uncertainty about safe support and bleeding. A professional can test the hydraulic system and verify torque, runout, and wheel clearance with the right equipment. Brake work is not a good place to improvise. The cost of diagnosis is small compared with the consequences of an avoidable installation error.
The same habit of acting early applies in less related maintenance situations too; a practical pantry pest guide makes the point that small signs are easier to manage before an issue spreads. Here, the equivalent is addressing drag, corrosion, or a leak before it damages more parts.
Replacing Volvo brake calipers safely
Caliper replacement is a hydraulic repair, not simply a remove-and-refit job. Work on level ground with the vehicle properly supported, and follow the service information for the specific application. Keep friction surfaces free of grease and use only the specified brake fluid. If the caliper is being replaced because of overheating or uneven wear, inspect the pads, rotor, hose, and hardware before deciding what to reuse.
Preparing the vehicle and selecting replacement parts
Gather the correct caliper, pads or pad hardware if required, seals or crush washers, brake fluid, tools, protective gloves, and a suitable catch container. Confirm the bleeder position before installation; a caliper mounted on the wrong side may not bleed properly. Compare the replacement with the old part on the bench. Have a plan for supporting the brake hose so it is never left carrying the caliper’s weight.
Removing the old caliper and managing brake fluid
After removing the wheel, protect the hose and control fluid loss according to the service procedure. Do not allow the caliper to hang from the flexible hose, and do not let dirt enter an open hydraulic connection. Cap or plug components only with clean, suitable materials. Brake fluid damages some finishes, so wipe spills promptly and dispose of old fluid responsibly.
Installing pads, hardware, and the replacement caliper
Clean the mounting surfaces and fit the hardware in the correct orientation. Lubricate only the specified sliding contact points with brake-safe lubricant; friction faces, pad linings, and rotor surfaces must remain dry and clean. Tighten fasteners to the vehicle’s specified torque and route the hose without twisting or rubbing. Before fitting the wheel, verify pad movement, bleeder access, and clearance.
Bleeding the brake system and checking for leaks
Bleed the affected circuit or the complete system as required by the vehicle’s service instructions. Keep the reservoir at the correct level, use clean fluid from a sealed container, and continue until the fluid is clear of air. Pumping the pedal must be done carefully, especially on systems with specific bleeding procedures. Afterward, hold pedal pressure, inspect every connection, and perform a cautious low-speed test before normal driving.
A video can help visualize the sequence, but it cannot replace the vehicle-specific service procedure or a final leak and pedal check.
Maintaining Volvo brake calipers for longer service life
Calipers last longer when movement remains free and contamination is controlled. Routine brake inspections are easiest during tire rotations or pad service, when the hardware is already visible. Maintenance should focus on function rather than making the parts look new. If corrosion has affected a sealing surface or piston bore, cleaning alone is not a repair.
Cleaning and lubricating caliper hardware
Remove loose dirt with appropriate brake cleaner and a suitable brush, keeping the spray away from sensitive components as directed by the product instructions. Inspect guide pins, boots, abutment clips, and pad contact points for rust or distortion. Use only the lubricant specified for the application and apply it sparingly. Excess grease can migrate onto the friction material and compromise braking.
Preventing corrosion in winter and wet conditions
Road salt and standing water accelerate corrosion around brackets, pins, bleeders, and pad edges. Rinsing the underside after salty conditions can help, provided water is not forced into damaged boots or electrical connectors. During seasonal inspections, look for rust lifting hardware away from its seating surfaces. A clean, dry inspection is more useful than applying an unapproved coating over hidden damage.
Inspecting brake fluid and flexible brake hoses
Brake fluid absorbs moisture over time, so follow the vehicle maker’s replacement interval or the advice of a qualified technician. Check the reservoir, hose surfaces, fittings, and caliper connections for discoloration, swelling, cracking, or dampness. A flexible hose can deteriorate internally and restrict release even when its outer surface looks acceptable. Fluid condition and hose health belong in the same inspection as caliper movement.
Bedding in new pads and monitoring post-installation performance
New pads and rotors need a controlled bedding process that follows the pad and vehicle instructions. Avoid repeated hard stops immediately after installation, and allow appropriate cooling between applications. Over the next several drives, monitor pedal feel, wheel temperature, noise, tracking, and pad contact. If the vehicle pulls, smells hot, or develops a soft pedal, stop and have the work checked rather than trying to bed through the symptom.
For owners who also maintain vehicle appearance, caliper appearance options may be tempting, but any cosmetic addition must leave heat, inspection access, wheel clearance, and safe operation unaffected. Mechanical condition comes first.
Conclusion
Reliable Volvo brake calipers depend on correct fitment, free movement, sound hydraulics, and careful service. Identify the exact application, inspect the whole corner of the vehicle, and treat leaks, drag, uneven wear, and overheating as reasons to investigate promptly. Whether the answer is a standard replacement or a documented upgrade, safe installation and follow-up checks are what make the brake system dependable.
Frequently Asked Questions
How long do brake calipers usually last?
Their service life varies with climate, mileage, road salt, brake-fluid maintenance, and driving conditions. A caliper may last many years, but corrosion, sticking movement, or a damaged seal can require earlier service.
Can a sticking brake caliper be repaired?
Some calipers can be professionally rebuilt if the bore, piston, and mounting surfaces remain serviceable. Severe corrosion, damaged threads, or a worn bore usually makes replacement the safer choice.
Should brake calipers be replaced in pairs?
Not always. The decision depends on condition, axle position, age, corrosion, and whether the replacement matches the opposite side. Replacing both sides can provide consistency when both units are similarly worn.
What causes uneven brake pad wear?
Restricted guide-pin movement, a sticking piston, damaged hardware, incorrect installation, rotor problems, or hose restrictions can all contribute. The caliper and the surrounding brake components should be inspected together.
Can a bad caliper damage the rotor?
Yes. A dragging pad can create excessive heat, while uneven contact can produce irregular wear or surface damage. The rotor should be measured and inspected before deciding whether it can be reused.
Why does the car pull when braking?
Unequal brake force can cause pulling, but tires, alignment, suspension, wheel bearings, and hydraulic components can produce similar symptoms. A complete inspection is needed before blaming the caliper.
Is bleeding necessary after replacing a caliper?
Usually, yes, because opening the hydraulic connection can introduce air. Follow the vehicle-specific bleeding procedure, then verify pedal firmness and inspect every connection for leaks before driving normally.