

Key Takeaways
A sound cooling system is central to reliable Volvo ownership. The right diagnosis and exact replacement part can prevent an avoidable overheating event.
- Match the radiator to the vehicle’s exact model, year, engine, and transmission.
- Treat leaks, overheating, low coolant, and discolored fluid as reasons to investigate promptly.
- Use a pressure test to locate leaks that are not obvious during a visual inspection.
- Replace damaged hoses, fittings, or fans rather than assuming the radiator is the only fault.
- Bleed the system carefully after installation and confirm stable operating temperature.
Understanding the Volvo radiator and cooling system
The radiator is the cooling system’s main heat exchanger. Hot coolant travels from the engine into the radiator, where airflow removes heat before the fluid returns to circulate again. Because the system works as a group, a radiator symptom does not always mean the radiator itself has failed. Model, engine, equipment level, and transmission all affect the parts around it.
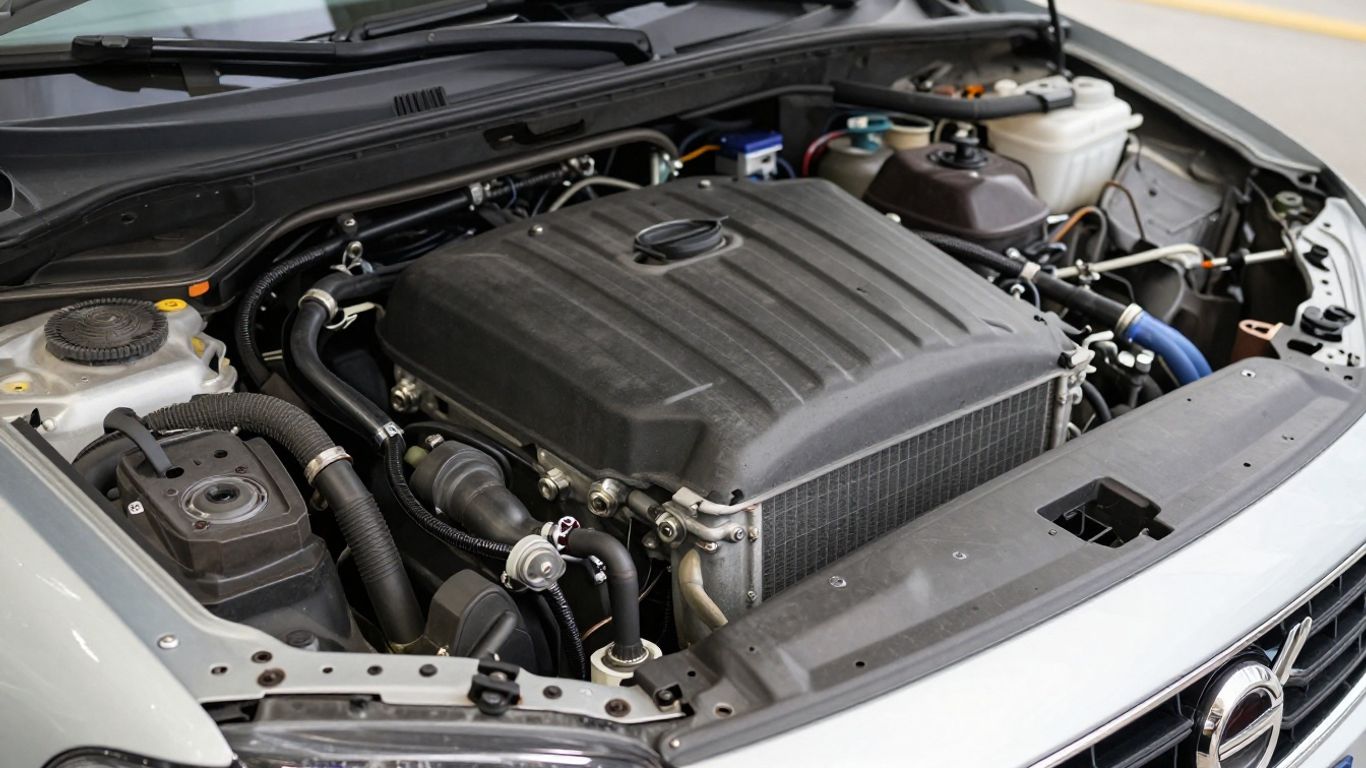
What the radiator does in a Volvo cooling system
Coolant absorbs heat from passages around the engine and carries it to the radiator. Inside the radiator, the fluid moves through narrow tubes while air passes over fins attached to them. That exchange lowers coolant temperature before the fluid returns to the engine. If airflow, coolant flow, or radiator capacity is compromised, engine temperature can rise.
Key components that work with the radiator
The thermostat controls when coolant begins flowing through the radiator, while the water pump circulates it through the engine and hoses. Electric or belt-driven fans help maintain airflow when road speed is low. The expansion tank accommodates changes in coolant volume, and the pressure cap helps keep the system at its designed pressure. A weakness in any of these components can resemble a radiator problem.
Differences across Volvo cars, SUVs, and model years
Radiator dimensions and mounting points vary between vehicles, even when two models look similar or share an engine family. Core thickness, hose position, fan shroud arrangement, and available space can change with a model-year update. Before ordering, verify the vehicle identification number and compare the replacement with the original part. A broad search for a Volvo radiator is only a starting point, not proof of fitment.
How automatic transmission cooling affects radiator design
Some radiators include an integrated cooler for automatic transmission fluid, while others use a separate cooler. That changes the connections, fittings, and installation procedure. A radiator that fits the engine bay may still be wrong if its transmission-cooler provisions do not match the vehicle. The do88 performance radiator page is one example of a radiator listing that identifies specific Volvo applications, so application details should always be read closely rather than inferred.
Signs your Volvo radiator may be failing
Cooling-system faults often develop gradually. A small seep may become visible only after a drive, while a restricted radiator may work normally in light traffic and struggle under load. These clues are useful, but none should be treated as conclusive without inspection. Early attention is usually less expensive than continuing to drive with an overheating engine.
Coolant leaks and visible radiator damage
Look for wetness around the radiator tanks, seams, drain area, and hose connections. Dried coolant can leave a colored or chalky residue even when the surface is no longer wet. Bent fins reduce airflow, while cracked plastic tanks or damaged mounting points can allow leaks. Never open a pressurized cooling system while it is hot.
Engine overheating and rising temperature readings
A temperature gauge that moves higher than usual, warning message, or steam from the engine bay deserves immediate attention. Stop safely, switch off the engine, and allow it to cool before checking anything. Continuing to drive can turn a cooling-system fault into expensive engine damage. Overheating may come from the radiator, but a thermostat, fan, pump, hose, or low coolant level can produce the same broad symptom.
Low coolant levels and repeated reservoir refills
A reservoir that repeatedly falls below its marked level indicates that coolant is escaping, being pushed out, or possibly entering a part of the engine where it does not belong. Topping up may hide the symptom for a short time but does not correct the cause. Record how often the level drops and inspect for deposits around joints and underneath the vehicle.
Rust, sludge, or discolored coolant
Healthy coolant should match the type and condition specified for the vehicle. Rust-colored fluid, sediment, oily film, or thick sludge suggests contamination or internal corrosion and warrants further testing. Flushing without finding the cause may provide only temporary improvement. The condition of the fluid should be considered alongside hose condition, radiator flow, and service history.
Sweet smells, steam, and other warning signs
A sweet smell after driving can indicate coolant reaching a hot surface. Hissing, gurgling, or visible steam may point to a leak or trapped air, although sound alone cannot identify the failed part. A useful reference for symptom recognition is this guide to failing radiator signs. Treat any combination of warning signs seriously, especially if the cabin heater suddenly blows cool air while the engine temperature rises.
How to diagnose a Volvo radiator problem
Diagnosis works best when it proceeds from simple observations to controlled tests. Begin with the coolant level, visible condition, and service history, then inspect the surrounding components. Avoid replacing the radiator solely because the engine ran hot once. The goal is to identify where coolant or heat-management performance is being lost.
Checking coolant levels and inspecting the radiator
With the engine cold, check the expansion tank against its markings and inspect the radiator, hoses, clamps, fan area, and ground beneath the vehicle. Look for staining, bent fins, loose fittings, and signs of previous repairs. Check whether airflow is blocked by leaves or dirt. A flashlight and clean gloves make small traces easier to find without disturbing hot components.
Pressure-testing the cooling system
A pressure tester can reveal a slow leak that does not appear during a static visual check. The system is pressurized to an appropriate level while the technician observes whether pressure holds and searches for escaping coolant. Testing should follow the vehicle’s service procedure and use the correct adapter. Pressure testing can locate a leak, but the failed component still has to be identified before parts are ordered.
Distinguishing radiator failure from thermostat problems
A thermostat stuck closed can cause rapid overheating even when the radiator is sound. A thermostat stuck open may keep the engine below its normal operating temperature and reduce cabin-heater performance. Uneven temperature across radiator surfaces, restricted flow, and external leakage suggest different lines of investigation. Comparing symptoms with scan data and temperature measurements is more reliable than relying on the gauge alone.
Identifying water pump, hose, and fan issues
Inspect hoses for swelling, soft spots, cracks, and collapse. A failing water pump may produce leakage or abnormal noise, while a fan fault often becomes apparent when the vehicle is stationary or moving slowly. Loose drive components and blocked airflow can also affect cooling. A separate roof repair cost guide illustrates a similar ownership principle: the visible damage is not always the full repair problem, so the underlying cause and scope should be checked before approving work.
When diagnostic tools and professional testing are needed
Professional testing is sensible when the system repeatedly loses coolant, overheating occurs without an obvious leak, or air continues to enter after bleeding. Scan tools can show stored temperature-related faults and live coolant-temperature data, but they do not replace physical inspection. Specialist equipment may also be needed to test combustion gases, radiator flow, or fan operation. Stop driving if the temperature warning returns.
A short repair history is useful when discussing the problem with a workshop. Note the coolant type, recent work, warning messages, driving conditions, and whether the heater output changed. That information narrows the diagnosis and helps avoid replacing several unrelated parts.
How to choose the right Volvo radiator
Choosing a replacement is more than matching a photograph. The radiator must fit the vehicle physically and support the cooling-system configuration already installed. Compare the original part, catalog data, connection layout, and warranty terms before purchasing. Exact fitment matters most because a small mismatch can create installation delays or a leak.
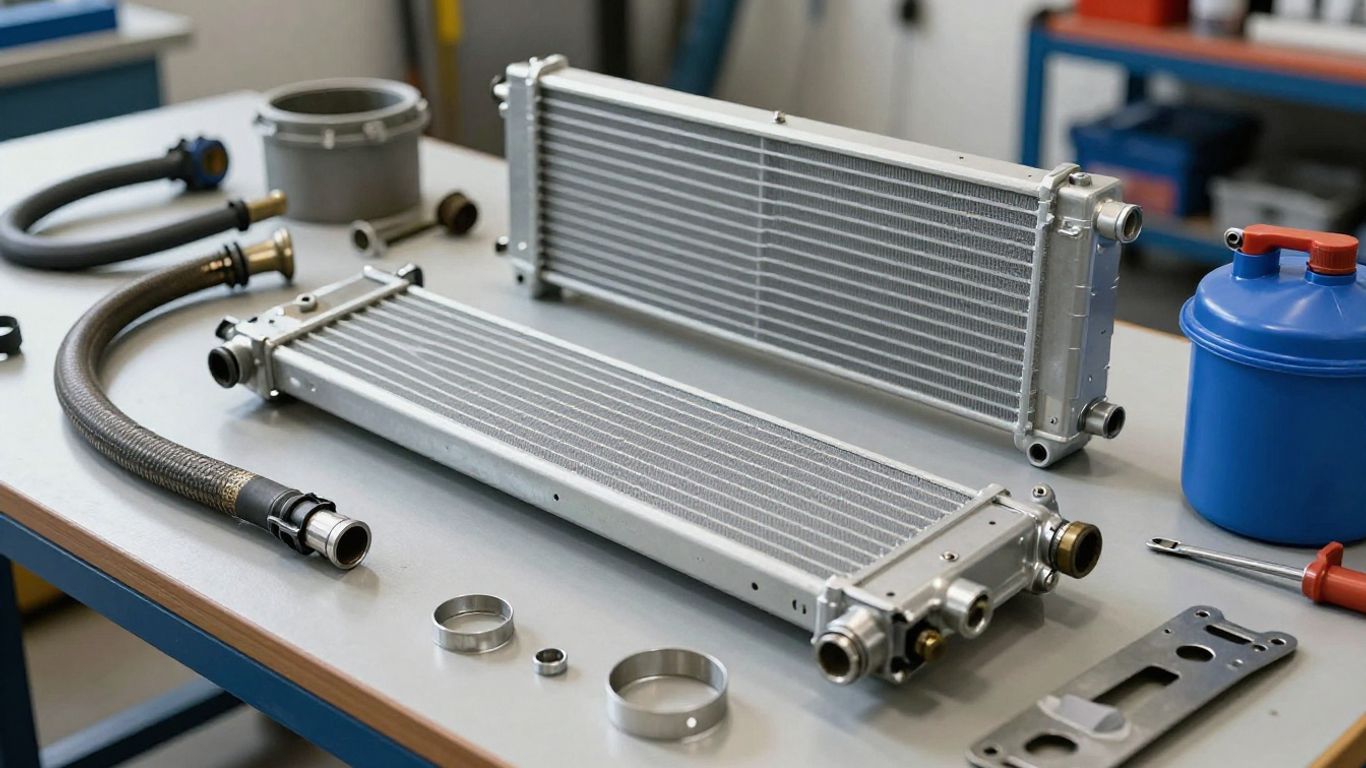
Matching the radiator to the exact Volvo model and year
Confirm model, model year, engine, fuel type, transmission, drivetrain, and production variations where relevant. The vehicle identification number is often the safest reference, particularly when catalogs list several radiator versions. Check dimensions and mounting points against the old unit before removing it. Do not assume that a radiator for a related model will use the same hose or fan arrangement.
Comparing OEM, aftermarket, and used radiators
An original-equipment radiator may offer the most direct match, while a reputable aftermarket part can be a practical alternative when its specifications are clear. A used radiator may cost less, but its age, internal condition, and previous exposure to corrosion are harder to establish. Compare construction, application coverage, return policy, and warranty rather than price alone. The choice should reflect the vehicle’s condition and how long it is expected to remain in service.
Checking transmission cooler and hose connections
Inspect whether the old radiator has threaded transmission-cooler ports, hose-barb connections, or no integrated cooler at all. Check the position and thread type of every connection, including the drain and bleed provisions. A mismatch can lead to improvised routing or damaged fittings. If the vehicle uses an external transmission cooler, confirm that the replacement radiator does not accidentally omit a required provision.
Reviewing materials, construction, and warranty coverage
Radiators commonly combine metal cores with molded tanks and sealed joints, but construction details differ between suppliers. Look for clear information about core dimensions, tank material, included fittings, and testing. Warranty length matters, but so do exclusions for installation mistakes, contamination, or overheating caused by another component. Keep the invoice and fitment information in case a return becomes necessary.
Avoiding fitment errors when ordering online
Online catalogs can contain overlapping applications, superseded part numbers, and images that do not show every connection. Before checkout, compare the listing with the old radiator and ask the seller to confirm the vehicle details in writing. Keep the original part until the new one has been checked. For broader financial comparisons around ownership decisions, readers may encounter wealth planning advice, email service comparisons, safe earring materials, and flooring material choices; none of those subjects replaces vehicle-specific parts verification.
How to replace a Volvo radiator
Radiator replacement involves coolant, electrical connectors, hoses, and sometimes transmission-fluid lines. Work only on a completely cool vehicle and protect painted surfaces from coolant. Have the replacement part, fresh fluid, suitable containers, and access to the vehicle’s service instructions ready before draining anything. If the front-end arrangement is unfamiliar, photographs taken during disassembly can prevent routing mistakes.
Preparing the vehicle, tools, and replacement coolant
Park on a level surface, apply the parking brake, and disconnect the battery if the service procedure calls for it. Gather screwdrivers, sockets, pliers, drain pans, hose-clamp tools, protective gloves, and replacement seals or clips. Use coolant compatible with the vehicle and mix it as specified rather than guessing from color. Never pour used coolant onto the ground; store it securely for proper recycling.
Draining coolant and removing connected components
Remove the appropriate covers and open the drain point only after confirming the engine is cold. Collect the fluid, then disconnect the upper and lower hoses, fan wiring, and any transmission-cooler lines fitted to the radiator. Cap open lines where appropriate to limit contamination and fluid loss. Work slowly around aging plastic clips, since forcing them can create additional repairs.
Installing the new radiator and securing all fittings
Transfer only the components that the replacement requires, such as mounting bushings or brackets, and compare each connection with the original before lowering the radiator into place. Seat the radiator fully in its mounts and tighten fasteners evenly. Reconnect hoses with sound clamps and ensure cooler lines are secure without cross-threading. Keep wiring clear of fans, belts, and sharp edges.
Refilling and bleeding air from the cooling system
Refill through the specified point with the correct coolant mixture, following the vehicle’s bleeding procedure. Air pockets can reduce circulation and create misleading temperature changes, so heater settings and bleed points matter. Run the engine only as instructed, watching the level as air leaves the system. Do not remove a cap while the system is hot or pressurized.
A proper bleed is complete only when the level stabilizes and the system reaches normal operation without repeated bubbling or coolant loss. If the level drops sharply, shut the engine down and investigate rather than continuing to add fluid. The replacement process is not finished until the cause of any abnormal behavior is understood.
Checking for leaks and confirming proper operating temperature
Inspect every hose joint, radiator seam, drain point, and cooler connection after the first warm-up and again when the vehicle is cold. Confirm that the fan operates when required and that the cabin heater produces consistent warmth. A short, cautious road test should be followed by another visual inspection. Any warning message, rising temperature, or fresh coolant trace calls for immediate review.
Volvo radiator maintenance and ownership costs
Routine checks help catch small faults before they become roadside failures. Maintenance is not only about the radiator itself; coolant chemistry, airflow, hoses, fans, and the expansion tank all influence service life. Keep records of fluid changes and cooling-system repairs so future symptoms have useful context. Costs vary widely because the radiator may be only one part of the job.
Recommended coolant inspection and replacement intervals
Inspect coolant level and condition at regular service visits and before long trips. Replacement timing depends on the coolant specification, vehicle instructions, age, and previous maintenance, so follow the schedule for the specific car rather than a universal interval. If fluid is contaminated or the system has been opened, additional inspection may be appropriate. Never mix incompatible coolant types casually.
Keeping fins, hoses, and the condenser free of debris
Leaves, mud, and insects can restrict airflow through the radiator and condenser. Clean debris gently without bending the fins, and inspect the front of the cooling stack when servicing the vehicle. Hoses should remain flexible and free from bulges or abrasion. A clean exterior cannot repair internal blockage, but it removes one simple source of poor cooling.
Factors that influence radiator replacement costs
The part price is only one element of the final bill. Labor access, coolant, hoses, clamps, fan shrouds, transmission-fluid service, and seized fasteners may all affect the total. A workshop may also recommend pressure testing or replacing related aging components while the system is open. Ask for an itemized estimate that separates diagnosis, parts, fluids, and labor.
Preventing overheating after radiator installation
Recheck the coolant level after the first complete cool-down and look for fresh deposits around every connection. Confirm that the fan, thermostat, water pump, and hoses are operating as expected if symptoms persist. Avoid heavy loads until the system has passed several normal temperature cycles. A new radiator cannot compensate for trapped air, a failed fan, or a circulation problem elsewhere.
Knowing when repair is safer than replacement
A loose clamp, damaged hose, or replaceable fitting may be repairable without replacing the entire radiator. A cracked tank, severe corrosion, blocked core, or repeated seam leak generally makes replacement the safer long-term choice. The decision should account for access, part availability, vehicle value, and the likelihood of another failure. When in doubt, have the system tested before authorizing work.
Conclusion
A Volvo radiator is best understood as one part of a complete temperature-control system. Careful inspection, pressure testing, exact fitment checks, and a methodical refill can prevent a small leak or airflow issue from becoming major engine damage. When the diagnosis is uncertain, professional testing is usually cheaper than guessing with replacement parts.
Frequently Asked Questions
How long does a radiator usually last?
Service life varies with coolant condition, corrosion, road debris, heat cycles, and vehicle use. Regular inspections can reveal leaks or deterioration before failure.
Can a car overheat if the radiator is full?
Yes. A full reservoir does not prove that coolant is circulating correctly or that airflow is adequate. Thermostat, pump, fan, blockage, and pressure problems can all cause overheating.
Is a radiator leak always visible?
No. Some leaks appear only when the system is hot or pressurized, and small leaks may evaporate on hot surfaces. Pressure testing can help locate them.
Should coolant be checked when the engine is hot?
Check the level only according to the vehicle’s instructions, and never remove a pressurized cap from a hot system. Allow the engine to cool fully before opening the system.
Can a damaged radiator be repaired?
Minor issues such as a loose clamp or replaceable hose connection may be repaired. Cracked tanks, severe corrosion, and blocked cores often make replacement more dependable.
Why does the temperature rise in traffic but not on the highway?
That pattern can indicate inadequate low-speed airflow, such as a fan or shroud problem. It can also reflect a marginal radiator or another cooling-system fault.
What should be checked after radiator replacement?
Check coolant level, leaks, hose and cooler connections, fan operation, heater performance, warning messages, and stable temperature through several complete heat cycles.