

Key Takeaways
A clean cabin filter supports comfortable airflow and helps keep dust and airborne particles out of the passenger compartment. The right replacement depends on your Volvo model, driving conditions, and the filter’s fit.
- Check the correct part number and model-year compatibility before buying.
- Replace the filter when airflow weakens, odors appear, or the filter looks loaded with debris.
- Follow the airflow arrow when installing the new filter.
- Inspect the housing for leaves, moisture, and damage during replacement.
- If problems continue after replacement, investigate the HVAC system rather than fitting another filter immediately.
Understanding your Volvo cabin filter
The cabin filter sits within the ventilation system and cleans air before it reaches the interior. Although it is a small service part, its condition can affect comfort, visibility, and the workload placed on the blower. A Volvo cabin filter is therefore worth treating as part of routine maintenance, not as an item to ignore until the vents stop working.
What the cabin filter does
The filter catches airborne material drawn into the HVAC system, including dust, pollen, and larger particles. Its job is not to repair the climate-control system or remove every possible contaminant, but to reduce what enters through the ventilation path. Because the filter is exposed to whatever surrounds the vehicle, it gradually collects material as the fan operates.
A filter that is heavily loaded can restrict the volume of air passing through it. Small maintenance checks matter because they can reveal a dirty filter before the change in airflow becomes frustrating.
How it protects air quality inside the vehicle
A clean filter helps reduce the amount of dust and pollen circulated through the vents. This can make the cabin feel fresher, especially when the vehicle is driven near construction, on unsealed roads, or during high-pollen seasons. It does not replace sensible cleaning of the interior or resolve an HVAC system contaminated by standing moisture.
Passengers who notice irritation or persistent odors should consider the broader ventilation system as well as the filter. A new filter may help, but it cannot correct every source of poor cabin air.
The difference between particulate and activated carbon filters
Particulate filters are designed primarily to capture solid airborne material. Activated carbon versions add a carbon layer intended to help reduce certain odors and gaseous pollutants. The two types can look similar, so the product description and compatibility information matter more than appearance alone.
Carbon is not automatically the best choice for every vehicle or driver. Consider the conditions in which the car is used, the manufacturer’s specification, and whether the extra material changes the filter’s dimensions or airflow resistance.
How the cabin filter affects heating and air conditioning performance
The filter does not create heat or cold, but it influences how easily air moves through the HVAC system. When it becomes clogged, the blower may move less air, and the cabin can take longer to warm, cool, or demist. Weak airflow can also be caused by a blower, door, fuse, or control fault, so the filter is only the first sensible check.
The same principle applies across vehicle types, including larger applications where parts are often searched by an OE number. The Volvo cabin air filter listing is an example of why application details should be checked before assuming that a similarly named filter will fit.
Knowing when to replace the filter
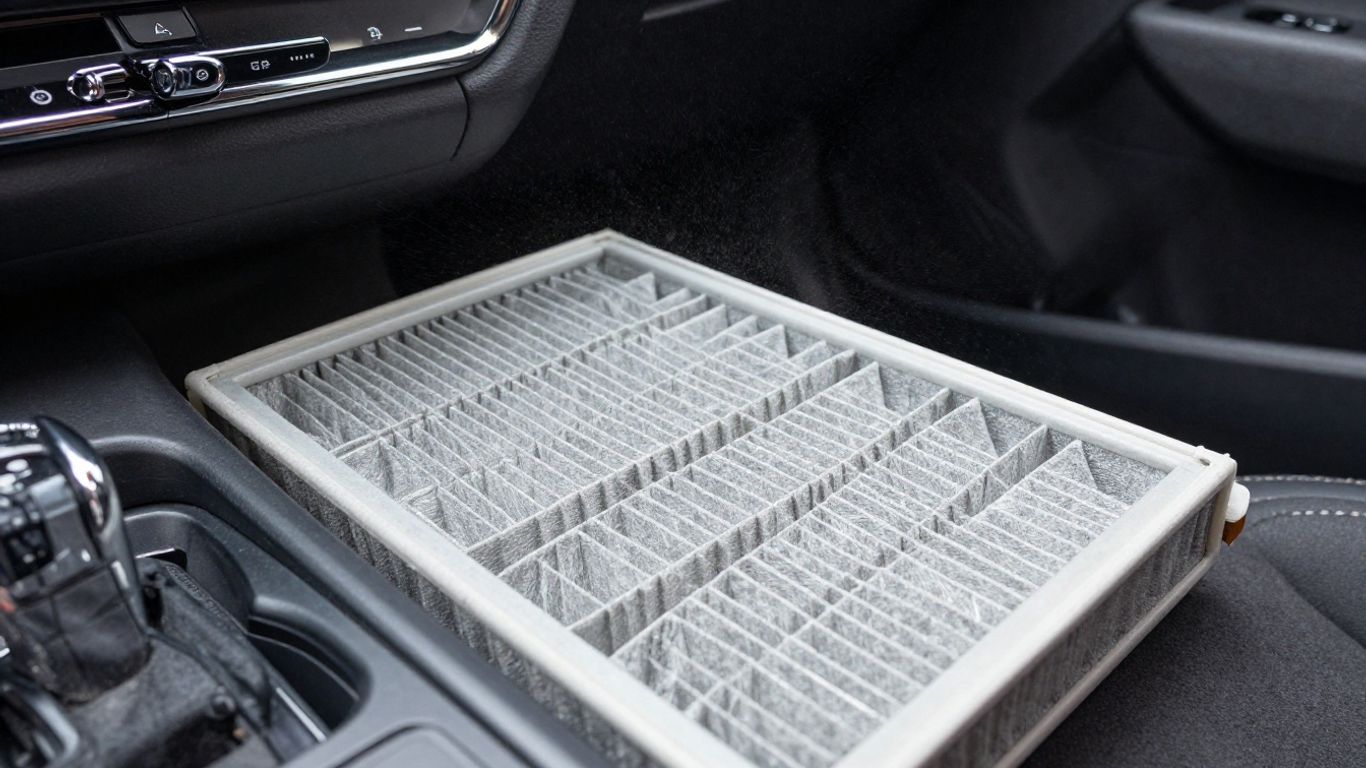
Replacement timing depends on the vehicle’s maintenance guidance and the conditions in which it is driven. A calendar interval is useful, but it should not override clear symptoms or a visibly dirty filter. If the vehicle spends much of its time in dust, traffic, or damp conditions, an earlier inspection is sensible.
Recommended replacement intervals
Start with the interval in the owner’s handbook or service schedule, then adjust your inspection habits to suit local conditions. Some drivers can follow the normal service rhythm, while others may find that the filter loads up sooner. When the handbook and the part supplier describe different applications, use the information that matches the exact vehicle.
Keep a record of the date and mileage when the filter is changed. That simple note makes it easier to spot a pattern and prevents replacement from becoming guesswork.
Signs of a clogged or damaged filter
A filter deserves attention when the vents deliver noticeably less air, the HVAC system develops a musty smell, or dust appears around the dashboard and vents. Physical damage, dampness, or a collapsed pleat is also a reason to replace it. A useful cabin filter symptoms guide can help you compare these signs, but the filter itself should still be inspected.
Do not assume every odor or airflow problem comes from the filter. If the smell remains after replacement, the evaporator area, drain, or another HVAC component may need attention.
How driving conditions affect filter life
Frequent driving on dusty roads loads a filter quickly. Urban traffic, roadside pollen, construction zones, and parking beneath trees can also increase the amount of material drawn into the intake. Damp climates may introduce moisture and encourage unpleasant smells if leaves or debris block drainage around the housing.
Short trips can mean the ventilation system is used often without much sustained airflow, while long trips expose the filter to more total air volume. Neither pattern gives a universal replacement date, which is why inspection remains useful.
What happens when you delay replacement
A neglected filter may restrict airflow and make the climate-control system feel less effective. It can also allow accumulated dust and odors to remain in the ventilation path. Delaying replacement does not necessarily cause immediate damage, but it makes a small, inexpensive check less likely to stay small.
If the filter is wet, torn, or badly distorted, replace it promptly and look for the reason. Moisture around the housing should not be dismissed as normal filter wear.
Choosing the right Volvo cabin filter
A correct-looking box is not enough when buying a replacement. Volvo vehicles vary by model, year, engine, body style, and market, and parts that appear similar may have different dimensions or seals. The safest approach is to identify the vehicle precisely and compare the supplier’s fitment information with the old filter.
Matching the filter to your Volvo model and model year
Record the model, model year, engine details where requested, and vehicle identification information before searching. If the old filter has a printed part number, use it as a cross-check rather than relying on a photograph. A supplier that allows searching by vehicle details or OE number can reduce the chance of ordering the wrong application.
For broader maintenance research, keep the subject specific: a guide to PCR testing procedures may explain careful identification and reporting, but it is unrelated to vehicle fitment and should not be used as a parts reference.
Comparing OEM and aftermarket options
An OEM filter is made to the vehicle manufacturer’s specification, while an aftermarket filter may offer a different material, price, or filtration design. Neither label alone proves that a part fits your vehicle. Compare the stated application, dimensions, sealing edge, and airflow direction before weighing price.
A good aftermarket option should have clear fitment information and consistent construction. If the listing is vague about the application, saving money on the part may create extra work later.
Evaluating filtration ratings and materials
Look at the filter media, pleat quality, sealing frame, and any stated particulate or carbon function. Ratings are useful only when the testing basis and application are clear. A denser filter may capture more material, but it must still work properly with the vehicle’s blower and housing.
Avoid choosing solely from a dramatic rating or a low price. The practical question is whether the filter is suitable for the vehicle and the conditions in which it operates.
Checking fit, dimensions, and compatibility
Before installation, compare the new filter with the old one: length, width, thickness, frame shape, gasket, and locating features should correspond. A filter that requires force, bends at the corners, or leaves a visible gap is not correctly fitted.
The wider parts market includes unrelated product categories, so search results should be read carefully. Pages about Yoga and Ayurveda, VLC streaming, or a commercial interior fit-out contractor may be useful in their own contexts, but none can establish automotive compatibility.
Replacing a Volvo cabin filter
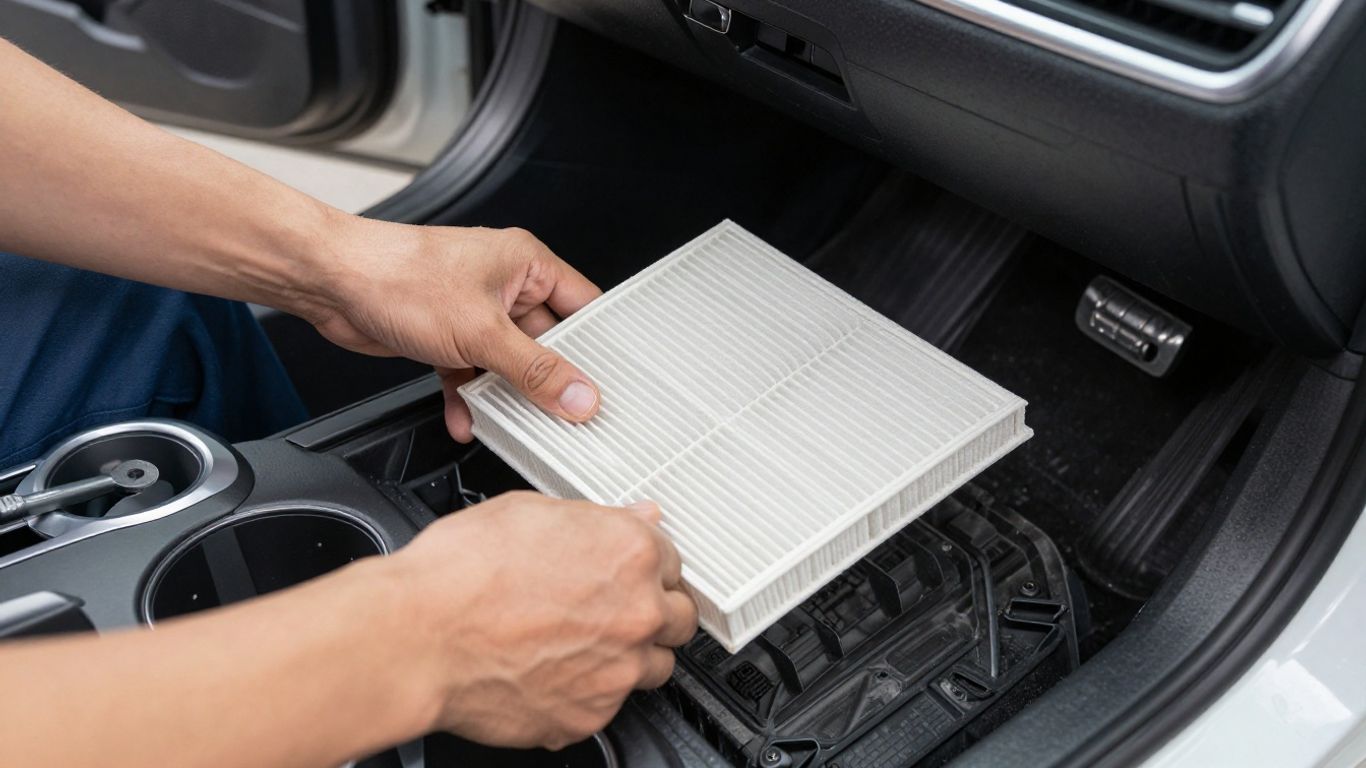
The exact access route varies between Volvo models, but the basic job is orderly rather than complicated. Work with the vehicle parked securely, keep dirt away from the open housing, and take a photo of the old filter before removing it. That photograph can confirm the orientation if the airflow marking is difficult to see.
Finding the filter housing
The housing is commonly located behind or below the glovebox, beneath the dashboard, or near the passenger-side footwell, though the position depends on the model. Consult the owner’s manual or a model-specific service guide before removing trim. Do not pull panels that resist removal; a hidden fastener may still be in place.
Once the access cover is open, note how the filter sits and where the airflow arrow points. This small pause prevents many installation mistakes.
Tools and preparation for the job
Most replacements need only basic hand tools, a light, and a clean surface for the new filter. A vacuum can help remove loose leaves and dust from the housing, but keep its nozzle from damaging delicate fins or wiring. If clips or screws are removed, place them together rather than leaving them in the footwell.
Switch off the ignition before working around the passenger-side dashboard. If the job requires electrical connectors or extensive trim removal, follow the vehicle’s service instructions.
Removing the old filter safely
Pull the filter out slowly so accumulated dust does not spill into the cabin or blower opening. If it is tightly packed, check for a retaining cover or tab instead of forcing it. Examine the old filter for damp patches, crushed pleats, leaves, or signs that air has been bypassing the seal.
A quick inspection of the empty housing can reveal debris that would otherwise be drawn into the new filter. Clean only what is accessible and avoid pushing material deeper into the HVAC case.
Installing the new filter in the correct airflow direction
Read the airflow arrow on the filter and match it to the direction marked on the housing. Slide the filter in evenly, keeping the frame straight and the seal seated. If it buckles or catches, remove it and check the orientation rather than applying pressure.
Refit the cover and trim, then run the fan through several settings. Confirm that airflow is steady and that no panel rattles. A short video walkthrough can be helpful for visual learners, provided it matches the same model and access arrangement.
Troubleshooting cabin filter problems
Replacing the filter is a sensible first step when ventilation changes, but it is not a universal cure. HVAC problems can involve the blower motor, resistor, doors, wiring, evaporator, drains, or control system. Work from the simplest checks to the more involved ones and stop if a component requires specialist diagnosis.
Weak airflow from the vents
Check the filter’s condition, orientation, and seal first. A filter installed backward or compressed into the housing can reduce airflow just as surely as a dirty one. If airflow remains weak with a correctly fitted new filter, compare fan speeds and check whether the problem affects every vent or only one area.
A blower fault, blocked intake, or air-distribution door may then be more likely. Continuing to replace filters will not solve a fault outside the filter housing.
Unusual odors inside the cabin
A musty smell may come from a damp filter, wet leaves, or moisture in the evaporator area. Replace a contaminated filter and inspect the housing for water entry or blocked drainage. If the smell is sweet, burnt, or accompanied by visible moisture, seek a more thorough inspection rather than masking it with fragrance.
When troubleshooting digital services, guides such as Atlas Pro ONTV troubleshooting discuss a different kind of fault entirely. The useful general lesson is to verify the basic connection or access point first; for a vehicle, that means checking the filter and housing before assuming a major HVAC failure.
Dust or debris entering the vehicle
First check that the filter is the correct size and that its frame sits tightly against the housing. Torn media, missing seals, or a cover that is not clipped in place can let air bypass the filtration surface. Also inspect the intake area for leaves and confirm that the filter was not damaged during installation.
If dust continues to appear, clean the nearby interior surfaces and monitor when it returns. Persistent debris may indicate a housing gap or an upstream problem rather than a poor-quality filter alone.
Persistent window fogging and moisture issues
Fogging can be affected by humidity, wet floor mats, recirculation settings, blocked drains, and the HVAC system’s ability to dry incoming air. A dirty filter can reduce airflow, but replacing it may not resolve a moisture source. Use fresh-air mode when appropriate and check for dampness inside the cabin.
If windows fog repeatedly in otherwise normal conditions, have the ventilation and drainage system examined. Reduced visibility is a safety concern, not merely a comfort issue.
Maintaining clean cabin air
Good cabin-air maintenance is mostly routine and observation. Keep the intake area clear, use the climate controls deliberately, and look at the filter before symptoms become severe. These habits are especially useful for cars driven in dusty suburbs, under trees, or through long wet seasons.
Keeping the filter area free of leaves and debris
Clear leaves and loose material from the area around the external air intake before they are pulled into the ventilation system. Do this gently, since forcing debris through the grille can make the housing harder to clean later. During servicing, use a light to check for material around the filter cover and nearby drains.
A clean intake reduces the load placed on the filter and makes the next inspection easier. It also helps distinguish normal filter dirt from a larger blockage.
Using the climate control system effectively
Use fresh-air mode when outside conditions are suitable and recirculation when you need to limit the intake of traffic fumes or dust. Periodically running the fan helps you notice changes in airflow and odor. Keep the controls and vents unobstructed so air can circulate through the cabin as intended.
These settings cannot compensate for a saturated filter or mechanical fault, but they can support more predictable ventilation between services.
Reducing allergens and interior pollutants
Vacuum carpets, clean hard surfaces, and avoid leaving damp items in the vehicle. Keeping windows closed near heavy dust or smoke can reduce the material entering the cabin, while regular filter replacement helps maintain the filtration path. Drivers with particular sensitivities may prefer a suitable carbon or higher-filtration option when the vehicle specification allows it.
No filter eliminates every pollutant. A clean interior and a well-maintained HVAC system work together to make the cabin more comfortable.
Inspecting the filter between replacement intervals
A quick inspection can be added to a service or seasonal check. Look at the pleats, frame, seals, and moisture level, then compare the filter with the conditions in which the car has been driven. These are useful clues to record:
- Heavy dust or pollen across the pleats.
- Leaves or fragments inside the housing.
- Dampness, staining, or a musty smell.
- A crushed frame or damaged sealing edge.
After checking, reinstall the filter only if it remains dry, intact, and correctly seated. Otherwise, fit a replacement and investigate any moisture or debris source before closing the housing.
Conclusion
Choosing, replacing, and checking a Volvo cabin filter is manageable when the process stays focused on fitment, airflow direction, driving conditions, and the wider HVAC system. A careful inspection can prevent poor airflow and unpleasant surprises, while a correctly matched filter keeps routine maintenance straightforward.
Frequently Asked Questions
How often should a cabin filter be replaced?
Follow the vehicle’s maintenance schedule, then inspect the filter sooner if you drive through dust, heavy traffic, pollen, or damp conditions. Symptoms and visible contamination are reasons to check the filter before the scheduled date.
Can a dirty cabin filter reduce airflow?
Yes. Dust and debris can restrict air passing through the filter, although weak airflow may also come from the blower, vents, doors, wiring, or another HVAC component.
Does a cabin filter remove bad odors?
A clean filter can help reduce some airborne odors, and an activated carbon filter may offer additional odor reduction. Persistent smells can originate in the evaporator, drains, carpets, or other damp areas.
How do I know which filter fits my vehicle?
Use the exact model, model year, engine information where required, and vehicle identification details. Compare the stated part number, dimensions, frame, seal, and airflow direction before ordering.
Can I install a cabin filter myself?
Many replacements are suitable for careful DIY work if access is straightforward. Follow the vehicle’s instructions, protect trim and wiring, and seek help if panels, electrical connectors, or restricted access make the job uncertain.
What does the arrow on a cabin filter mean?
The arrow normally indicates the direction air should travel through the filter. Match it to the airflow marking on the housing rather than choosing the orientation based only on how the old filter looks.
Why do my windows keep fogging after filter replacement?
Fogging may be caused by humidity, wet mats, recirculation settings, blocked drains, or an HVAC fault. If it continues with a new filter and normal settings, inspect the vehicle for moisture and arrange further diagnosis.