

Key Takeaways
A clean, correctly matched filter is a small part with an important job. The right selection and careful installation help keep routine oil service predictable.
- Match the filter to the exact Volvo model, engine, and service requirements.
- Replace the filter whenever the engine oil is changed unless the service instructions say otherwise.
- Check the gasket, thread, filter housing, and tightening method before installation.
- Use safe lifting and draining practices to protect yourself and the vehicle.
- Recheck the oil level and inspect for leaks before returning to the road.
Understanding the role of a Volvo oil filter
Engine oil circulates through moving components that depend on a steady supply of clean lubricant. The filter catches material suspended in that oil before it travels repeatedly through the engine. Choosing a suitable Volvo oil filter is therefore about more than matching a label; it is part of maintaining the intended lubrication system.
How the filter protects the engine
As oil moves through the engine, it helps reduce friction and carries heat away from loaded parts. The filter provides a controlled path through which that oil can pass while retaining unwanted particles. Correct filtration supports circulation without treating the filter as a substitute for the right oil, correct level, or regular servicing.
The filter also has to seal properly against its housing. A filter that fits the threads but does not seat correctly can allow oil to escape or bypass the filtering element, so fit and sealing deserve the same attention as the filter media itself.
What contaminants an oil filter removes
Used engine oil can carry dust, wear particles, residue from combustion, and fragments produced as components age. The filter is designed to retain suspended contaminants within its element rather than allowing them to continue circulating. The exact filtering performance depends on the specific filter design and the application for which it was made.
A dark filter or dark oil is not, by itself, a complete diagnosis. Oil changes color as it collects material and additives do their work. Inspection should be combined with the service interval, oil level, warning indicators, and any changes in engine behavior.
Why filter quality affects oil circulation
A filter must balance particle retention with the flow needs of the engine. If the element is unsuitable, damaged, or restricted, oil circulation may not behave as intended. That is why a low price alone is not a useful way to judge a replacement part.
Check the part number, application details, sealing surface, and packaging condition before fitting it. A reputable car parts supplier can help compare genuine and aftermarket options against the vehicle details rather than relying on a broad model name alone.
Signs that an oil filter may be overdue
A filter rarely announces its service life with one unmistakable symptom. A missed oil change, a service reminder, an unexplained oil leak, or a filter that appears damaged during inspection are stronger reasons to investigate. Oil pressure warnings, unusual mechanical noise, or a rapidly falling oil level should be treated more urgently than a routine maintenance reminder.
Do not wait for a visible symptom if the scheduled service is already due. Preventive replacement is usually simpler than trying to identify damage after lubrication has been compromised.
Choosing the right Volvo oil filter
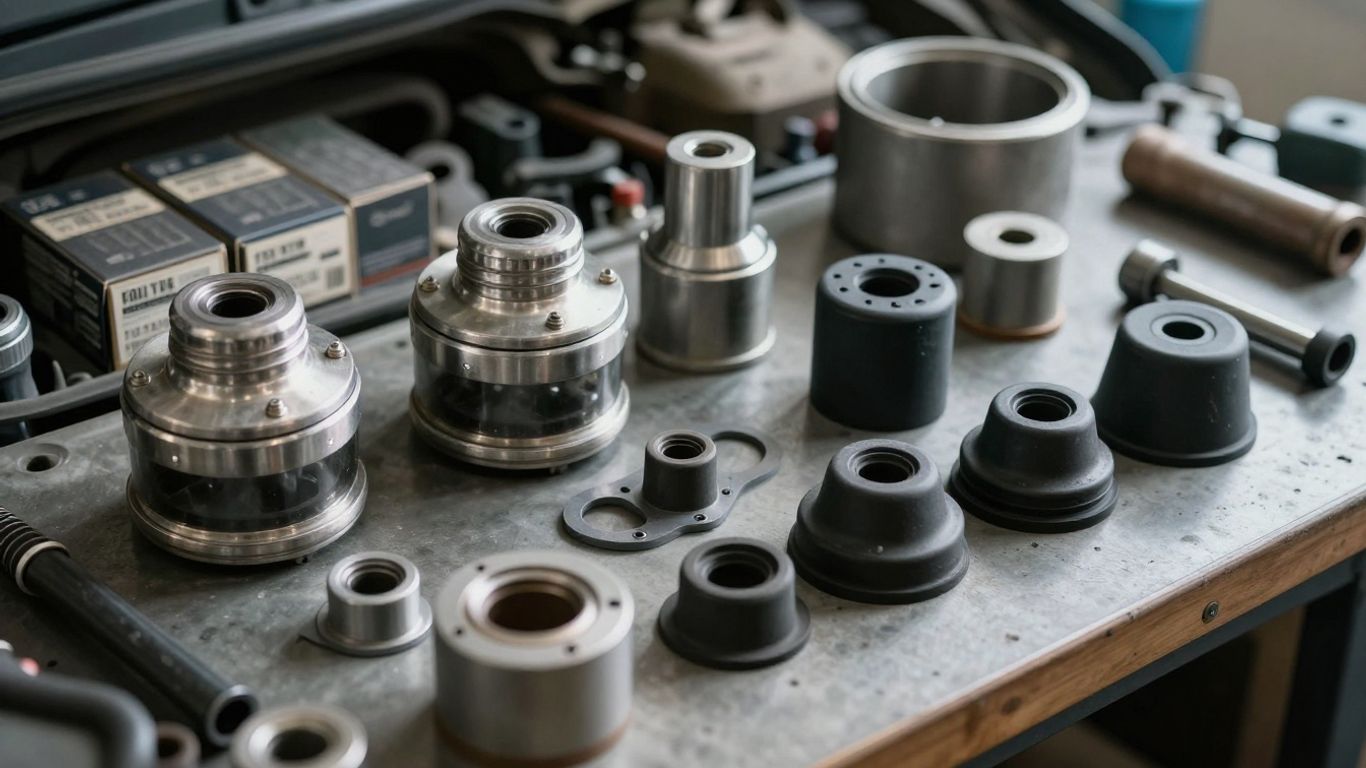
Filter listings can look similar while differing in thread, gasket profile, height, bypass arrangement, or engine application. Begin with the exact vehicle details and confirm the replacement against a reliable part-number reference. This is also a good point to compare a genuine replacement part only as a general purchasing principle: the wording is not a vehicle fitment reference, so the actual catalog information still takes priority.
Matching the filter to your Volvo model and engine
Use the model year, engine designation, displacement, and, where relevant, the vehicle identification number. Two vehicles carrying the same model badge may use different filters, particularly across engine families or production periods. A parts network serving Melbourne, Sydney, Brisbane, and other locations can often narrow the search quickly when those details are supplied together.
Never select a filter from the vehicle name alone. Confirm that the listing identifies the same engine and service application as the vehicle in front of you.
Comparing OEM and aftermarket filters
An original-equipment filter may be the straightforward choice when the owner’s documentation specifies it. A reputable aftermarket filter can also be appropriate when its application, dimensions, sealing surfaces, and published specifications match the vehicle. The useful comparison is between verified fit and construction, not between brand familiarity and a vague promise.
When ordering from a supplier, ask whether the part is new, genuine, or aftermarket, and make sure the description clearly identifies which one you will receive. That small clarification prevents avoidable substitutions.
Checking thread size, gasket design, and fit
Before installation, compare the old and new filters side by side. Look at the thread, gasket diameter, filter height, housing contact surface, and any center tube or cap arrangement. The new part should engage smoothly by hand; resistance at the first turns is a reason to stop rather than force it.
A filter wrench must also suit the filter’s shape. For compatible applications, the Motivx Tools MX2322 is described as an 86.4 mm, 16-flute wrench for 2014–2021 Volvo 2.0-liter four-cylinder turbo engines with smooth-top oil filter caps. Verify that the vehicle and cap match those details before using any tool.
Using the owner’s manual and part-number references
The owner’s manual is the best starting point for the specified oil type, service schedule, and basic maintenance information. A parts catalog or supplier lookup can then confirm the filter reference. Keep the old filter’s part number until the new one has been checked, but do not assume that a number printed on an old part is correct simply because it was installed previously.
If the manual, catalog, and vehicle details disagree, pause the job and resolve the discrepancy. A short confirmation call is safer than forcing a nearly compatible part into service.
When to replace a Volvo oil filter
The filter is normally changed as part of an engine oil service because the old filter has retained the material collected during the previous interval. Following the vehicle’s schedule gives the filter a defined service window instead of leaving the decision to appearance alone. Record the date, mileage, oil specification, and part number after each service.
Driving conditions can alter how quickly oil and filtration systems accumulate load. A sensible interval is one that follows the vehicle’s guidance while allowing for the way the car is actually used.
Coordinating filter changes with oil changes
Replacing the filter while the oil is drained avoids leaving an old filtering element in a freshly serviced lubrication system. It also makes the work easier to document as one maintenance event. Before loosening anything, check whether the engine uses a spin-on filter, a replaceable cartridge, or a cap-mounted element.
A new filter should be installed with the correct sealing method and tightening instruction. Do not use a generic tightening habit when the manufacturer provides a torque value or a specified number of turns after contact.
Adjusting intervals for severe driving conditions
Frequent short trips, extended idling, dusty roads, heavy loads, towing, and repeated stop-start traffic can place more demand on engine oil. In those circumstances, consult the manual for any severe-service schedule rather than inventing a shorter interval from guesswork. The same approach applies if the vehicle is used in unusually hot, cold, or dirty environments.
If the car’s use changes, update the maintenance record accordingly. A schedule that suited occasional highway driving may not suit repeated short urban trips.
Recognizing mileage, time, and service reminders
Mileage is only one part of the schedule. Time matters when a vehicle covers few kilometers, and the service reminder may reflect information entered during a previous visit. Check the date and odometer together, then verify what was actually replaced last time.
A simple service record can include:
- Date and odometer reading
- Oil grade and quantity used
- Filter part number and supplier
- Any leaks, warning lights, or unusual noises
That record makes the next decision easier and helps a technician understand the vehicle’s recent maintenance history.
Avoiding problems caused by delayed replacement
Delaying a filter change does not guarantee immediate damage, but it removes a layer of routine protection and makes the condition of the oil system less certain. An old filter may be loaded with retained material, while an overdue oil service may leave the lubricant outside its intended service window.
If a service has been missed, replace the oil and filter at the earliest practical opportunity. If the engine has an oil pressure warning, persistent noise, or a major leak, stop driving and arrange a proper diagnosis instead of treating the filter change as the only possible fix.
Tools and preparation for the job
Preparation keeps a routine service from becoming a rushed repair. Park on a stable, level surface, gather the replacement parts before draining anything, and allow enough time for the oil to drain without interruption. The vehicle’s exact filter design determines which removal tool is appropriate.
A clean work area also helps prevent dirt from entering the filter housing or filler opening.
Selecting the correct Volvo oil filter wrench
Some filters use a strap or cup wrench, while others require a tool that engages flutes on a cap or filter body. Measure or identify the filter before choosing the wrench, and make sure the tool can be used without striking nearby wiring, hoses, or covers. The wrong size can crush the filter or round the cap.
For the compatible smooth-top cap application described in the tool reference, the 86.4 mm 16-flute wrench is one example of a purpose-sized tool. Compatibility still needs to be confirmed against the specific vehicle before purchase or use.
Gathering drain pans, gloves, and replacement oil
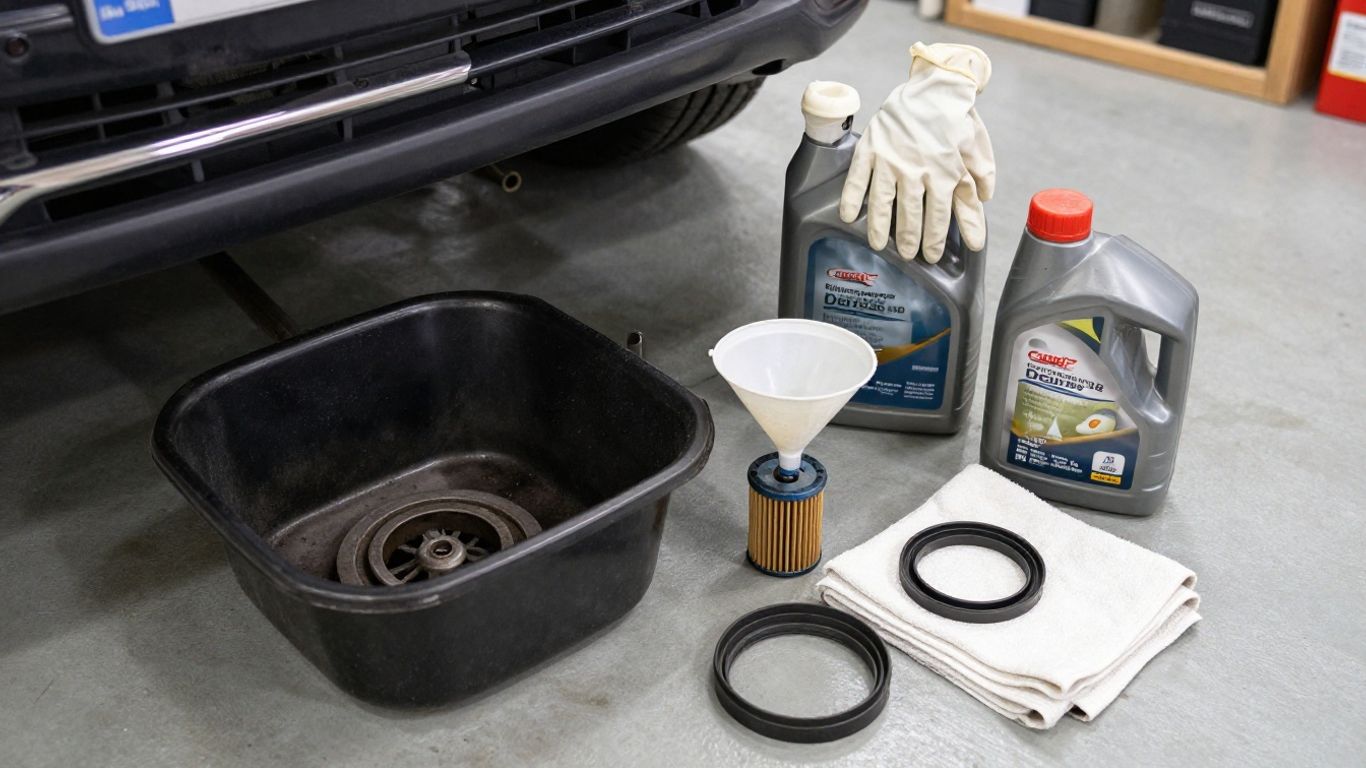
Use a drain pan large enough for the expected oil quantity, oil-resistant gloves, shop towels, and suitable eye protection. Have the correct replacement oil, a new filter, and any required sealing ring within reach. Keep a funnel available for refilling and a container ready for the used oil.
It is also useful to have a torque wrench when the drain plug or filter housing has a specified tightening value. Clean tools make it easier to notice a leak during the final inspection.
Preparing the vehicle safely for service
Warm oil drains more readily, but it can cause burns, so allow the vehicle to cool enough for safe handling. Engage the parking brake, place the transmission in the manufacturer’s recommended position, and use properly rated stands if the vehicle must be raised. Never rely on a jack alone.
Before crawling underneath, confirm that the vehicle is stable and that the drain pan is positioned correctly. Keep loose clothing and hands away from hot or moving components.
Confirming the new filter and sealing ring are ready
Compare the new component with the old one before opening the drain plug. Check the part number, gasket or O-ring, filter direction where relevant, and the condition of the sealing surface. A damaged box or dented filter should be set aside until its condition and suitability are clear.
If the new filter uses an O-ring, confirm that it is the correct ring and that it will sit in the specified groove. Do not place a replacement ring over an old one.
How to replace a Volvo oil filter
The sequence is straightforward, but each step affects the next one. Drain the oil into a suitable container, remove the old filter carefully, prepare the replacement, refill to the specified level, and inspect the work before driving. The filter design and engine layout may change the details, so the owner’s manual remains the final reference for vehicle-specific instructions.
Work slowly around hot oil and keep the drain plug, filter, and sealing surfaces clean.
Draining the old engine oil
Run the engine briefly if the service instructions allow it, then switch it off and position the drain pan beneath the plug. Remove the filler cap or loosen it as appropriate to help the oil drain, while keeping the opening clean. Loosen the drain plug carefully and let the oil flow until it has reduced to a slow drip.
Replace the drain-plug washer if the service instructions call for one. Clean the plug and surrounding area before reinstalling it to the specified tightness.
Removing the used filter without damaging components
Place the drain pan beneath the filter because oil will remain inside it. Use the correct wrench and turn the filter steadily, taking care not to twist nearby hoses, wiring, or plastic covers. Once loose, finish removal by hand and keep the filter upright as far as practical.
Inspect the filter seat after removal. An old gasket left stuck to the engine or housing can cause a serious leak when the new filter is installed.
Preparing and installing the replacement filter
Wipe the sealing surface clean, then lightly coat a rubber gasket with the specified fresh oil unless the filter instructions say otherwise. For a cartridge design, lubricate and position the new O-ring in the correct groove. Start the filter by hand and turn it until the gasket contacts its seat.
After that contact point, tighten it exactly as directed by the vehicle or filter instructions. Avoid using a long bar for extra force; overtightening can distort the seal and make the next service unnecessarily difficult.
Refilling the engine and checking the oil level
Add the specified oil gradually through a clean funnel. Do not pour the full stated capacity in one step, because some oil remains in the filter and passages and the actual level should be checked on the vehicle’s measuring system. Replace the filler cap, wait as directed, and check the level on level ground.
Top up in small amounts until the level reaches the permitted range. An overfilled engine can create its own problems, so more oil is not automatically better.
Inspecting for leaks after startup
Start the engine and watch the filter, drain plug, and nearby surfaces for several seconds. Switch the engine off, wait for the oil to settle, and check the level again according to the manual. A clean towel around the sealing areas can help reveal a fresh seep.
Do not drive away if oil is visibly leaking or an oil pressure warning remains illuminated. Correct the cause first, then repeat the level and leak checks.
Troubleshooting Volvo oil filter problems
Most filter-related problems can be narrowed down by checking the seal, fitment, oil level, and warning indicators in that order. A leak after service is not something to monitor casually, especially if oil is reaching the ground quickly. Stop, switch off the engine when safe, and inspect the installation.
When the cause is not obvious, avoid repeated tightening or repeated starts. Those actions can turn a small installation error into damaged threads or an empty sump.
Diagnosing leaks around the filter seal
First identify whether oil is coming from the filter gasket, the drain plug, the housing cover, or a nearby component. A double gasket, a pinched O-ring, dirt on the sealing face, or an incorrectly positioned ring can all prevent a proper seal. Clean the area, confirm the source, and compare the installation with the filter instructions.
A filter that was tightened beyond specification may have a distorted gasket. Replacing the seal or filter may be safer than trying to compensate with more force.
Understanding a warning light after an oil change
An oil pressure warning is different from a routine service reminder. If an oil pressure light remains on after startup, switch the engine off as soon as it is safe and check the oil level and visible leaks. Do not assume that resetting a service reminder has fixed a pressure problem.
If the level is correct and the warning persists, arrange professional diagnosis. The cause may involve the sensor, pump, wiring, filter installation, or another part of the lubrication system.
Handling a stuck or overtightened filter
Use the correct removal tool with steady pressure and protect surrounding components. Give the filter housing a clear path before applying force, and avoid puncturing a filter unless a qualified technician has determined that method is appropriate. A damaged housing or cap can cost more than the original service.
If the filter will not move without excessive force, stop and seek assistance. The vehicle may need a tool specific to its filter design.
Checking for incorrect filter fitment
Compare the new filter with the old component and the catalog reference. Check the thread, gasket, height, cap, and housing arrangement rather than relying on a similar appearance. If the filter starts crooked, binds immediately, or leaves the gasket outside its intended seat, remove it and do not continue.
A part can be listed for a broad vehicle range and still be wrong for a particular engine. Confirming the engine code or vehicle identification number is often the quickest way to resolve that uncertainty.
Knowing when professional service is the safer option
Professional help is sensible when the vehicle cannot be supported safely, the filter housing is damaged, the correct part remains uncertain, or an oil pressure warning appears. It is also the better choice when a leak continues after the installation has been checked. A qualified technician can inspect pressure, threads, seals, and adjacent components rather than guessing from the filter alone.
For owners arranging broader vehicle work, a collaborative service partner can be selected by comparing scope, planning, and on-site coordination; those same practical checks help when choosing a maintenance provider. Keep the service record and the removed parts available for inspection if needed.
Conclusion
Choosing and replacing a Volvo oil filter is manageable when the part is verified against the exact engine, the sealing surfaces are handled carefully, and the finished service is checked for level and leaks. A clear maintenance record, safe preparation, and timely professional help when something looks wrong will make the next oil service less uncertain.
Frequently Asked Questions
How often should an oil filter be replaced?
In most routine services, replace the filter when the engine oil is changed. Follow the vehicle’s schedule and use the severe-service guidance if the car regularly makes short trips, tows, idles for long periods, or operates in dusty conditions.
Can I replace the oil without replacing the filter?
It may be technically possible, but leaving the old filter in place means the fresh oil is circulating through an element that has already collected contaminants. Unless the service instructions say otherwise, replacing both together is the sensible routine approach.
How do I know which filter fits my vehicle?
Use the model year, engine details, vehicle identification number when available, and the owner’s manual or a reliable parts catalog. Confirm the thread, gasket, housing, and filter style instead of choosing by vehicle name alone.
Should I lubricate the filter gasket before installation?
For many rubber gaskets, a light coating of the correct fresh oil helps the gasket seat without twisting. Follow the filter instructions, and never install a new O-ring on top of an old one.
What should I do if the new filter leaks?
Switch off the engine if the leak is active, check the oil level, and inspect the gasket, sealing surface, and drain area. Do not keep driving while oil is escaping or an oil pressure warning is present.
Is a special wrench required for every oil filter?
No. Some filters can be removed with a strap or cup wrench, while cartridge caps and fluted filters may require a precisely sized tool. The wrench must match the filter or cap without damaging nearby components.
Can I drive after changing the filter?
Drive only after confirming the oil level, starting the engine, checking for leaks, and ensuring no oil pressure warning remains illuminated. If anything seems abnormal, stop and diagnose the problem before continuing.