

Key Takeaways
A careful fuel filter replacement starts with identification, not removal. Confirm the engine, filter location, fuel-flow direction, and priming method before opening the system.
- Match the filter to the exact Volvo model, engine, and production year.
- Treat gasoline and diesel systems differently, especially when water separation is involved.
- Use clean tools, eye protection, and a controlled method for catching fuel.
- Prime the system correctly rather than relying on prolonged cranking.
- Check for leaks and restricted flow before blaming the pump or injectors.
Understanding the Volvo fuel filter system
A fuel filter protects the rest of the fuel system by trapping particles and, in some diesel arrangements, separating water from fuel. Its condition can affect starting, acceleration, idle quality, and fuel delivery. The exact design depends on the engine and model year, so a general replacement method should always be checked against the vehicle’s service information.
What the fuel filter does
The filter sits between the fuel supply and the engine, allowing fuel to pass while retaining dirt, rust, and other contamination. A restricted element can reduce the volume of fuel reaching the engine, particularly when demand rises under acceleration or load. A clean filter cannot repair a failing pump or injector, but it removes one common cause of poor fuel delivery.
A filter also provides a useful inspection point. Fuel that looks unusually dark, contains visible particles, or has signs of water deserves attention beyond simply installing a replacement. If contamination is severe, the tank and lines may need inspection as well.
How fuel filtration differs between gasoline and diesel engines
Gasoline systems commonly use a sealed inline filter or a filter integrated with the pump and sender assembly. Pressure is often released before the filter is opened, and the electric pump may need several ignition cycles to refill the lines afterward.
Diesel systems generally place greater emphasis on removing water and managing air. A diesel filter may include a drain, sensor, transparent bowl, or separate water-separator function. Because high-pressure injection equipment is sensitive to contamination and air, diesel bleeding instructions should be followed closely rather than improvised.
The role of a fuel water separator in diesel models
A fuel water separator lets heavier water collect away from the fuel before the mixture reaches sensitive injection components. Some assemblies include a drain or water-in-fuel sensor, while others use a separate component upstream of the main filter. The design is not universal, so identify every hose and sensor before disconnecting anything.
Water in diesel fuel can cause corrosion, poor combustion, and starting problems. If the separator contains visible water or sludge, replacing only the filter may not resolve the underlying contamination. Drain it into a suitable container and dispose of the waste according to local requirements.
How filter location varies by Volvo model and year
Filter placement can vary from beneath the vehicle near the fuel tank to the engine bay or inside a combined pump module. Access may require raising the car securely, removing a cover, or releasing a retaining bracket. Never rely on a jack alone when working underneath a vehicle.
Before ordering parts, take a photograph of the existing filter and note the hose arrangement. A model-specific visual guide, such as the Volvo fuel filter replacement guide, can help with orientation, but the vehicle’s own specifications remain the final reference.
Choosing the correct Volvo fuel filter
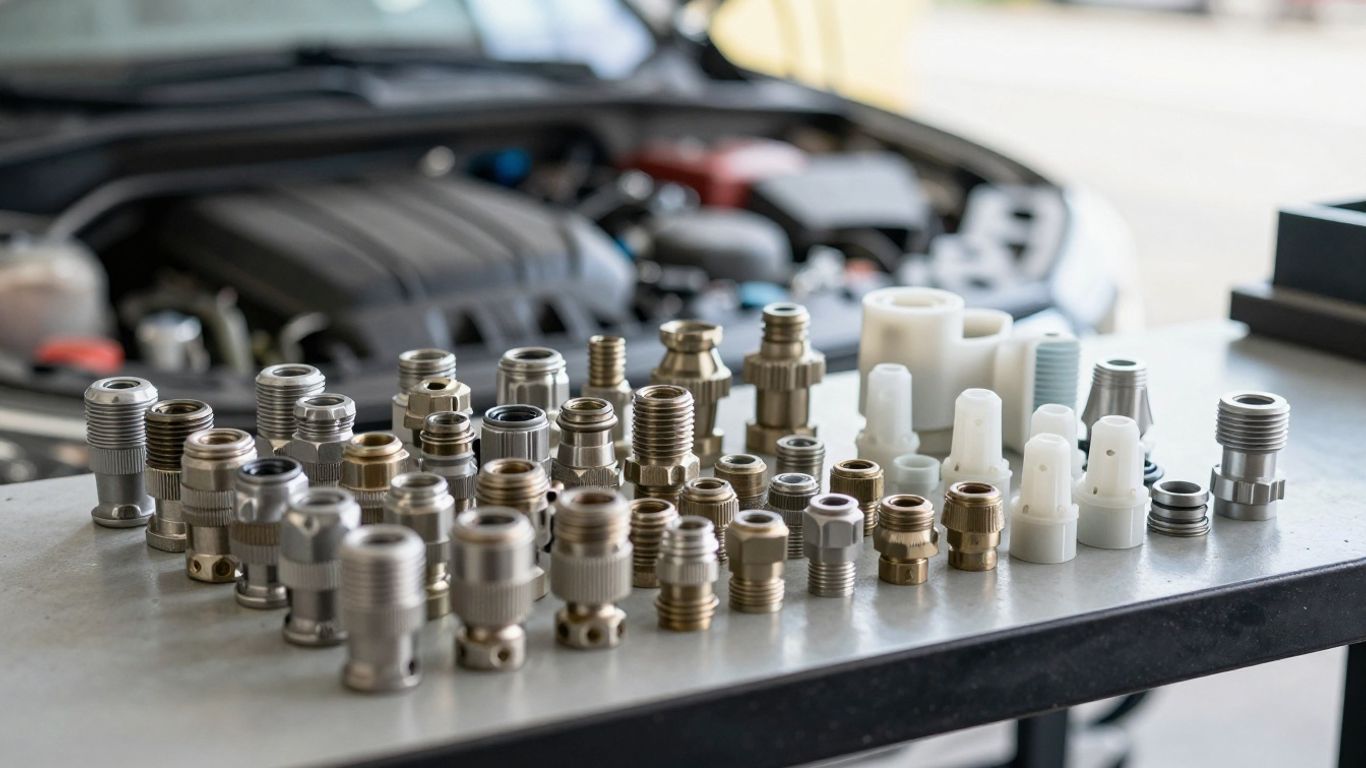
Choosing a Volvo fuel filter is more than matching a familiar name on a parts listing. The engine type, production year, connection style, filter dimensions, and pressure requirements all matter. A filter that appears similar may still have the wrong fittings or flow capacity.
Use the old part as a reference, but do not treat appearance alone as proof of compatibility. The part number, vehicle identification details, and supplier catalogue should agree before you buy.
Matching the filter to the model, engine, and production year
Start with the vehicle identification number or the exact catalogue application. Record whether the engine is gasoline or diesel, then check any engine-code differences within the same model range. Production-year changes can affect fittings, filter location, and whether the filter is a standalone part or part of a larger fuel-module assembly.
If the vehicle is a marine or commercial application, use that application in the search rather than assuming a passenger-car part will fit. The Volvo Penta parts shop is specifically presented as a source for fuel filters designed for Volvo Penta engines, which is a different fitment exercise from selecting a road-car filter.
Comparing OEM and aftermarket filters
An original-equipment filter follows the vehicle maker’s specified application, while an aftermarket filter may offer another option when its catalogue data and specifications match. Price alone is a poor deciding factor. Look for accurate cross-references, correct seals, documented pressure ratings, and a reputable source.
Inspect the replacement before installation. The ports should match the original, the housing should be undamaged, and the supplied clips or seals should correspond to the connection type. If the listing is vague about application, pause rather than guessing.
Checking fuel-flow direction, fittings, and pressure ratings
Many inline filters have an arrow showing the intended direction of fuel flow. Quick-connect fittings, threaded ports, banjo bolts, and hose-barb connections are not interchangeable without the correct hardware. A filter must also tolerate the system’s operating pressure; an attractive physical match can still be unsuitable.
A small comparison table helps separate the details that need checking from those that are merely cosmetic:
| Check | What to confirm | Why it matters |
|---|---|---|
| Application | Model, engine, and year | Prevents incorrect fitment |
| Flow direction | Arrow or manufacturer instruction | Supports proper fuel delivery |
| Connections | Port type, size, clips, and seals | Prevents leaks and loose lines |
| Pressure rating | Required operating pressure | Protects the filter and system |
| Dimensions | Length, diameter, and bracket fit | Ensures secure installation |
After the table, compare every row with the product information and the vehicle’s existing arrangement. If one key detail remains unknown, obtain the specification before opening the fuel system.
Identifying compatible filters for Volvo Penta and commercial vehicles
Marine engines and heavy-duty vehicles may use larger filter assemblies, water separators, sensors, or different service intervals. They should be identified by engine and application, not simply by the word Volvo. The Davco Fuel Pro 382, for example, is described for Mack or Volvo heavy-duty on-highway diesel engines and combines fuel filtration with water separation, so it belongs to a specific commercial application rather than a general passenger-car category.
For a commercial or marine vehicle, confirm the flow rate, mounting arrangement, sensor connections, and replacement element before ordering. A filter that fits the thread but lacks the required water-separation or sensor provision is not a complete match.
Signs that the fuel filter needs replacement
A restricted filter can create symptoms that appear gradually or arrive suddenly after contaminated fuel is introduced. Starting may become slower, power may fade under load, or the engine may stall after running for a short time. None of these symptoms proves that the filter is at fault, but each gives a reason to test fuel delivery.
Record when the symptom occurs and whether it changes with engine temperature, fuel level, or demand. That pattern is often more useful than replacing parts at random.
Hard starting and extended cranking
A partially blocked filter can make the engine take longer to receive adequate fuel pressure. The result may be extended cranking, especially after the vehicle has been parked or after the filter housing has been opened. Air introduced during service can create a similar symptom, so the post-replacement priming procedure matters.
If the starter turns slowly, address the battery and electrical system first. Repeatedly cranking a healthy engine with inadequate fuel delivery can create unnecessary heat and drain the battery without solving the original problem.
Loss of power during acceleration or climbing
Fuel demand rises during acceleration, towing, or climbing. A filter with limited flow may allow the engine to idle normally but starve it when demand increases. Drivers may notice hesitation, reduced response, or a sudden loss of power that returns when the load falls.
A restricted filter is only one possibility. A weak pump, a blocked pickup, a pinched line, or an engine-control fault can produce similar behavior. Testing fuel pressure or flow is more reliable than relying on the symptom alone.
Rough idling, stalling, and engine hesitation
Contaminated or restricted fuel can cause an uneven idle, hesitation when the throttle opens, or stalling at low speed. Diesel engines may also run roughly when air remains trapped after filter service. Note whether the condition began immediately after refueling or after maintenance, since timing can point toward contamination or an installation issue.
Do not keep driving if the vehicle repeatedly stalls in traffic. A temporary restart does not make the underlying fuel-delivery problem safe to ignore.
Reduced fuel economy and warning-light symptoms
A filter rarely causes poor economy by itself, but restricted delivery can accompany misfiring, weak acceleration, or altered engine operation. A warning light may appear if the control system detects a related pressure or combustion issue. Read the diagnostic codes before clearing them, then inspect the filter and fuel quality alongside other likely causes.
A warning light is evidence that the system detected a condition, not a direct instruction to replace one particular part. Use it with physical inspection and appropriate testing.
How contaminated fuel can mimic other faults
Water, sediment, microbial growth, or incorrect fuel can imitate pump, injector, sensor, and ignition problems. The contamination may also clog a fresh filter quickly, making a replacement seem ineffective. Inspect drained fuel in a clear container where safe, and look for separation, unusual color, or debris.
If contamination is confirmed, replacing the filter without cleaning the affected parts may provide only temporary improvement. A repair facility can test the fuel and determine whether the tank and lines require further service.
Preparing for a Volvo fuel filter replacement
Preparation makes the job cleaner and reduces the chance of damaging a connector or spilling fuel. Work outdoors or in a well-ventilated area, keep ignition sources away, and allow hot components to cool. Read the removal and priming instructions before disconnecting the first line.
The correct method depends on whether the vehicle uses a pressurized gasoline system, a diesel filter housing, or a combined pump module. If access is poor or the fuel system is unfamiliar, professional service may be the safer choice.
Tools, replacement parts, and safety equipment
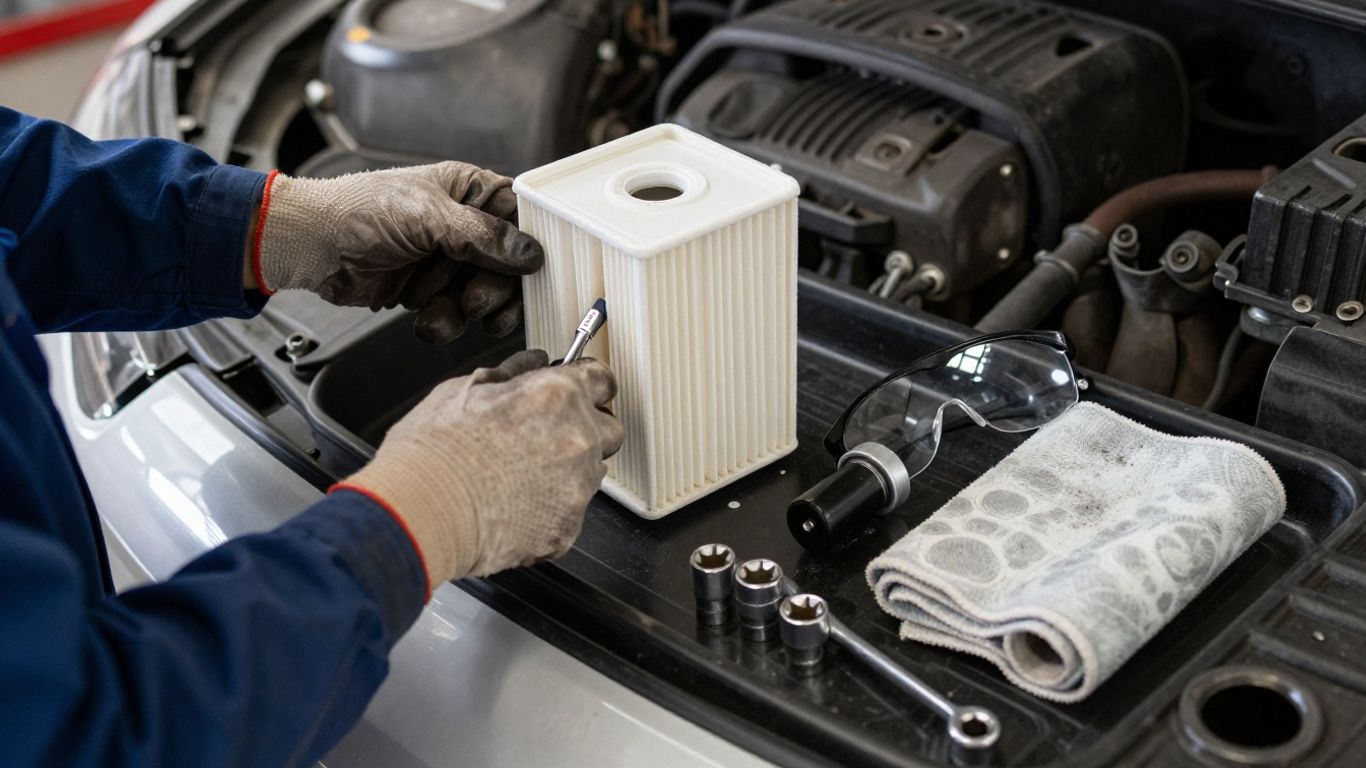
Gather the replacement filter, new seals or clips where required, suitable sockets, pliers designed for fuel-line connections, rags, a drain pan, and approved fuel-safe containers. Wear eye protection and gloves that resist fuel. Use proper lifting equipment and wheel chocks if the filter is underneath the vehicle.
A short preparation list keeps the work area orderly:
- Confirm the replacement part and flow direction.
- Prepare a container and absorbent material for spilled fuel.
- Disconnect or control the fuel supply as the service instructions require.
- Keep the old filter sealed until it can be inspected or discarded.
Once everything is within reach, check that no tool will put sideways force on a plastic line or electrical connector. A few minutes of preparation can prevent a much larger repair.
Relieving fuel-system pressure on gasoline models
Gasoline systems may retain pressure after the engine is switched off. The approved pressure-relief method can involve a service procedure, a fuse or relay, or a test-port arrangement, depending on the vehicle. Follow the service information and protect the connection with a cloth while opening it.
Never assume that several hours parked has removed all pressure. Keep your face away from the connection and collect the small amount of fuel that may escape. If you cannot identify the correct relief method, stop and have the system assessed.
Preventing spills, fire hazards, and fuel contamination
Fuel vapors can ignite from cigarettes, heaters, work lights, electrical sparks, or hot exhaust components. Keep the area ventilated and do not use an open flame to inspect leaks. Cap or cover disconnected lines so dirt does not enter while the filter is off.
Clean spills promptly with suitable absorbent material and store fuel-soaked waste safely. Do not pour fuel into drains or leave an open container beside the vehicle. Cleanliness protects both the repair and the person performing it.
When professional service is safer than DIY work
Professional help is sensible when the filter is inside a fuel tank, the vehicle uses a high-pressure diesel injection system, access requires complicated lifting, or the lines and fittings are damaged. It is also the better option when contaminated fuel may have reached the pump or injectors.
A short DIY guide, including the Matthews Volvo Site, can clarify the general sequence for certain older models, but it is not a substitute for model-specific instructions. Stop if a connector will not release normally, a line cracks, or fuel continues to spray after pressure relief.
How to replace a Volvo fuel filter
The broad sequence is to identify the filter, control fuel pressure or supply, disconnect the lines, remove the old unit, install the replacement in the correct direction, and inspect the work. Details vary enough that the vehicle’s instructions should guide the exact connection method. Take a photograph before removal if the line routing is not obvious.
Work slowly around plastic fittings. Forcing a release tab or twisting a rigid line can turn a routine filter service into a fuel-line repair.
Removing the old filter without damaging fuel lines
Place the drain pan below the filter and support the housing or bracket as connections are released. Use the correct tool for the fitting, pull in the prescribed direction, and avoid prying against the line. If a connection is stuck, clean around it and recheck the release mechanism rather than applying sudden force.
Once disconnected, cap the open lines and remove the old filter from its bracket. Compare its ports and orientation with the new part before discarding it; the comparison can reveal a wrong filter before the system is reassembled.
Installing seals, clips, and connections correctly
Use only the seals supplied or specified for that connection. A seal that is flattened, cut, swollen, or installed dry when lubrication is specified may leak. Replace one-time-use clips rather than relying on a damaged retaining piece.
Push each connection fully into place until its lock engages, then give it the prescribed gentle pull test. Do not use the hose itself as a lever. The connection should be secure without being twisted or under tension.
Positioning the new filter in the proper flow direction
Align the filter arrow with the direction fuel travels toward the engine. Refit it in the original bracket or mounting position, keeping hoses away from exhaust heat, sharp edges, and moving components. Incorrect orientation can restrict delivery even when the filter and connections appear to fit.
Before priming, trace each hose from the tank or supply side to the engine side. This simple check catches reversed connections while the system is still easy to correct.
Checking for leaks after installation
Prime the system using the appropriate method, then inspect every connection with the engine off before starting. Look for wetness, a growing drop, or fuel odor. After the engine starts, inspect again while it idles and once more after a short drive, provided the initial checks are clean.
A leak that appears only under pressure is still a leak. Shut the engine off, relieve pressure safely, and correct the connection rather than tightening a fitting that was not designed to be tightened.
Priming and bleeding the fuel system
Opening a fuel system can introduce air, and the correct recovery method depends on the engine. Gasoline vehicles often use the electric pump to refill the lines, while diesel systems may require a manual primer and controlled bleeding. Follow the manufacturer’s sequence instead of treating all systems alike.
If the engine does not start after a reasonable priming attempt, stop to inspect the installation. More cranking is not automatically more effective.
Priming procedures for gasoline Volvo models
After a gasoline filter replacement, switching the ignition on without starting may run the electric pump briefly. Repeating the approved key-on and key-off sequence can refill the filter and lines. Listen for the pump and check carefully for leaks during the process.
The exact timing and number of cycles varies, so use the vehicle’s service instructions. If the pump does not run, investigate its fuse, relay, wiring, or control signal rather than continuing to cycle the ignition indefinitely.
Bleeding air from diesel fuel systems
Diesel systems may need air removed from the filter housing and supply lines before the engine can run normally. Some have a bleed screw, while others use a hand primer or an electric priming routine. Open only the point specified by the service procedure and collect fuel safely.
Air can also enter through a poorly seated seal or loose connection. If the engine starts and then stalls, inspect the filter housing and suction-side fittings before assuming the injectors have failed.
Using a hand primer or electric fuel pump
A hand primer should feel different as the system fills, although the exact resistance depends on the design. An electric pump may run for a short period during key-on or through a diagnostic function. Neither method should be used with an open fuel connection or an uncontained spill.
Prime in short, controlled intervals and inspect for leaks between attempts. If the primer never firms up, look for an air leak, incorrect filter fitment, blocked pickup, or a valve that is not sealing.
Avoiding damage from repeated cranking
Long cranking sessions can overheat the starter, discharge the battery, and create unnecessary stress. Use short attempts with cooling pauses, and stop if the engine shows no sign of catching after the recommended priming sequence. A battery charger or proper support battery may be needed, but it will not correct a leak or blocked line.
A no-start after filter service should trigger a methodical inspection: connection security, filter direction, fuel supply, pressure, and trapped air. That order is safer than immediately replacing additional components.
Troubleshooting after filter installation
A successful installation ends with verification, not simply a running engine. Check for leaks, stable idle, normal throttle response, and any warning lights. If the vehicle still has trouble, compare the new symptoms with the old ones and test the system rather than assuming the new filter is defective.
Keep the old part and packaging until the vehicle has operated normally. They can help with a fitment query or warranty discussion if a mismatch appears.
Diagnosing a no-start condition
First confirm that the filter is installed in the correct direction and that every line or connector is fully seated. Then check whether the system was primed, whether the pump operates, and whether the engine has the required fuel pressure. For diesel systems, trapped air remains a common possibility after filter service.
If there is fuel pressure but no start, ignition, immobilizer, sensor, or injection control faults may be involved. Scan for diagnostic codes and avoid repeatedly cranking while the cause is still unknown.
Finding leaks around the filter housing and fittings
Inspect the filter body, drain, sensor, seals, quick-connects, and hose ends with a bright light. A dry paper towel touched near—but not inside—the connection can help reveal fresh fuel. Do not use your fingers to search for a pressurized leak.
Correct the root cause: a pinched seal, incomplete clip engagement, cracked line, damaged port, or incorrect filter. Wiping away the fuel without repairing the connection is not a solution.
Checking for restricted fuel flow
A new filter can still fail to deliver fuel if the pickup screen, tank outlet, hose, or filter housing is blocked. Compare measured fuel pressure or flow with the vehicle’s specification. On diesel systems, inspect for water or debris that may have returned from contaminated fuel.
Do not substitute a larger or loosely fitting filter to overcome a restriction. The restriction must be located and repaired while preserving the system’s required pressure and filtration.
Determining whether the issue is the pump, injectors, or filter
Use symptoms and measurements together. A filter problem often appears as restricted flow or pressure under demand, while a pump problem may affect pressure across several operating conditions. Injector concerns require appropriate testing and should not be diagnosed solely from a rough idle or hard start.
Online searches can also mix relevant repair information with unrelated material such as 18-wheeler blind spots, Forza Horizon drift, EA FC 26 tactics, F1 25 driving, or Trivexa BR savings. Keep the diagnostic trail focused on the vehicle, its engine, and measured results.
Setting a practical replacement and inspection schedule
Use the vehicle’s maintenance schedule as the starting point, then adjust inspection habits for fuel quality, dusty conditions, long storage, heavy loads, or repeated water contamination. A filter should also be checked when symptoms point toward restricted fuel delivery, even if the calendar interval has not arrived.
Record the date, mileage or operating hours, part number, and any contamination found. That simple log makes future service easier and helps distinguish a recurring fuel-quality problem from a one-time filter restriction.
Conclusion
Replacing a Volvo fuel filter is manageable when the part is correctly identified, the fuel system is handled safely, and priming is treated as part of the repair rather than an afterthought. Work from the vehicle’s specifications, inspect every connection, and use measured testing when symptoms remain. A careful process protects the engine and prevents a small filter problem from becoming a larger fuel-system repair.
Frequently Asked Questions
How often should a fuel filter be replaced?
Follow the vehicle manufacturer’s service interval, then consider earlier inspection when fuel quality is uncertain, the vehicle operates under heavy load, or symptoms suggest restricted flow.
Can a clogged fuel filter cause a car not to start?
Yes, a severely restricted filter can prevent adequate fuel delivery, although a weak pump, electrical fault, immobilizer issue, or trapped air can cause the same result.
Should the fuel system be depressurized before changing a filter?
Gasoline systems may retain pressure and should be relieved using the approved procedure. Diesel systems have different arrangements, so follow their specified service method.
How do I know which direction to install an inline filter?
Look for the arrow or flow marking on the filter and match it to the direction of fuel travel toward the engine. Confirm the arrangement before disconnecting the old part.
Why does an engine stall after a filter replacement?
Possible causes include air in the system, an unsecured connection, a reversed filter, a damaged seal, contaminated fuel, or a separate pump or engine fault.
Is it safe to drive with a leaking fuel filter?
No. Fuel leakage creates a fire hazard and can allow air into the system. Switch the engine off, keep ignition sources away, and have the leak repaired before driving.
Can I replace a fuel filter myself?
Some external filters are suitable for careful DIY service, but tank-mounted filters, high-pressure diesel systems, damaged fuel lines, and persistent leaks are better handled by a qualified technician.