

Key Takeaways
Choosing and caring for headlights starts with identifying the vehicle’s exact lighting setup. A careful fitment check and a properly aimed beam matter as much as the lamp’s technology.
- Identify the model year, trim, and existing headlight configuration before ordering parts.
- Compare halogen, HID, and LED systems by compatibility and beam performance, not bulb type alone.
- Confirm whether a replacement assembly supports adaptive features already fitted to the vehicle.
- Follow vehicle-specific service instructions when changing a bulb or complete assembly.
- Keep lenses clear and check alignment so the road is lit without creating glare.
Understand Volvo headlight types
Headlights vary in both the technology that produces light and the shape of the optics that direct it. A vehicle may use different configurations depending on its year and trim, so appearance alone is not enough to identify a replacement. Knowing the basic terms makes it easier to compare a part with what is already installed.
Halogen, HID, and LED systems
Halogen, high-intensity discharge (HID), and LED systems produce light in different ways, and they are not automatically interchangeable. The existing housing, wiring, and vehicle equipment all influence which replacement is appropriate. This quick comparison is a starting point, not a substitute for checking the exact part specification.
| System | General characteristics | Fitment consideration |
|---|---|---|
| Halogen | Uses a replaceable filament bulb | Match the bulb type and rated specification |
| HID | Uses a discharge lamp and associated components | Confirm the lamp and ballast arrangement |
| LED | Uses light-emitting diodes, in a bulb or integrated assembly | Check whether the unit is designed for the original housing |
A technology label does not tell the whole story: the beam pattern and the approved housing matter too. In particular, the correct lighting match means choosing a compatible system rather than assuming a newer bulb will work in any lamp.
Projector and reflector designs
Reflector and projector designs describe how a headlamp directs its light, not the light source itself. A reflector uses shaped surfaces around the source, while a projector assembly directs light through a lens. Either design can be paired with different lighting technologies, so the lens shape by itself does not confirm bulb compatibility.
When comparing a replacement, look for the stated beam pattern and application, not just a photograph of the front of the lamp. For readers considering a specialized conversion, projector retrofit options provide an example of how a retrofit may be specified for particular vehicle applications. That does not make every projector unit suitable for every housing; check the listed application carefully.
How Volvo’s “Thor’s Hammer” signature lights work
“Thor’s Hammer” is a name commonly used for a distinctive T-shaped lighting signature on some vehicle designs. The visible shape is a styling detail in the lamp; it does not by itself identify the low-beam source, replacement bulb, or adaptive-lighting equipment. For an overview of the signature design on select models, see Thor’s Hammer lighting, then verify the actual assembly fitted to the vehicle in question.
Identify the right headlights for your Volvo
The safest way to shop for Volvo headlights is to start with the vehicle’s identification details and the part currently installed. Similar-looking lamps can differ in connectors, mounting points, or lighting functions. A few minutes spent confirming the configuration can prevent delays and avoid ordering a part that cannot be fitted.
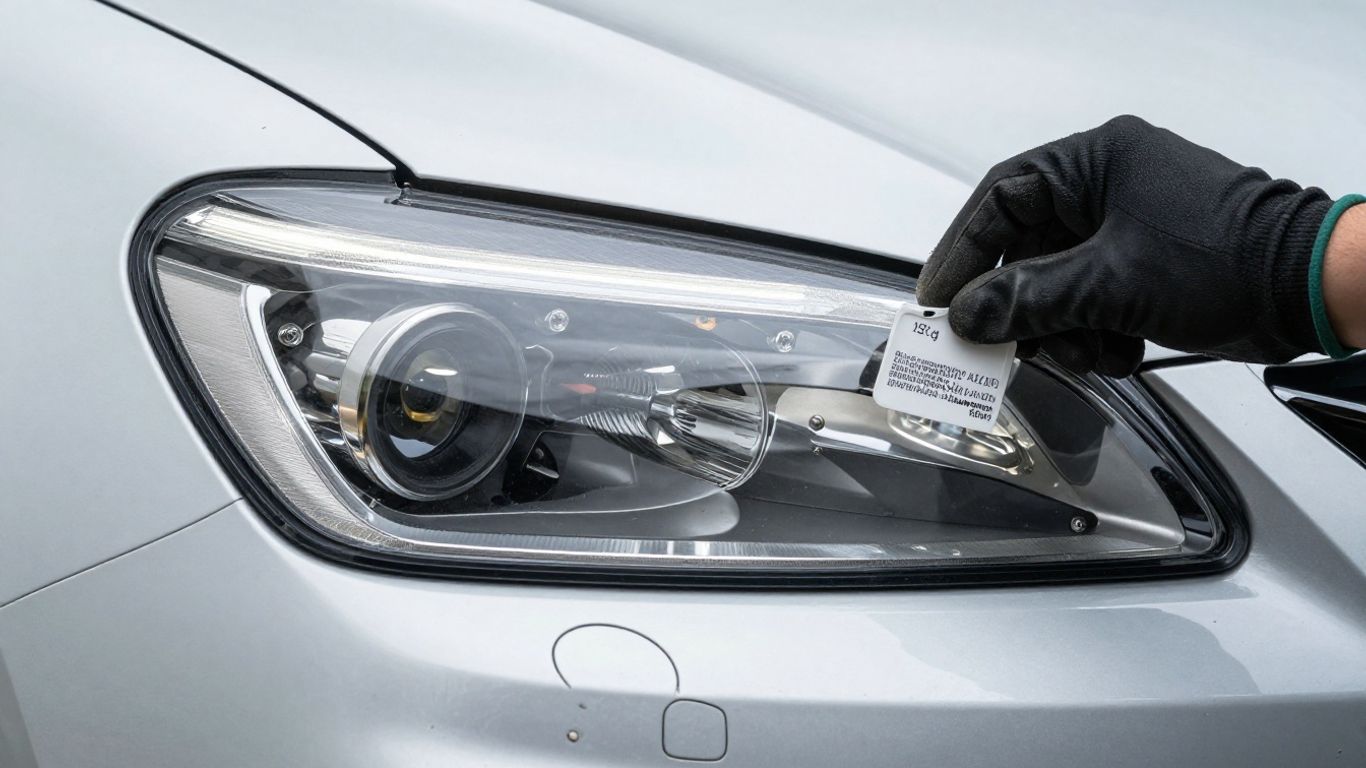
Check the model year and trim
Record the model year, trim, and body style before searching for a lamp or bulb. A mid-year change or equipment package may affect which headlight assembly applies, so use a vehicle’s registration or identification details alongside the seller’s fitment guide. Where there is uncertainty, ask the parts supplier to confirm the application before placing the order.
For readers also comparing other vehicle add-ons, accessory fitment offers a related reminder: confirm the intended vehicle and check the terms that apply to the item. That general principle is useful, but the headlight’s own fitment listing remains the relevant guide here.
Find the part number and headlight configuration
If accessible, inspect the label or markings on the existing assembly and note any part number. Also record whether the lamp is a complete unit or a replaceable-bulb design, and whether it includes functions such as an integrated daytime light or adaptive movement. These details help distinguish components that may look almost identical from the outside.
A parts search is only as useful as the information entered into it. This is similar to long-tail keyword research, where more specific terms can narrow a search; for a headlight, the useful specifics are the vehicle details and the assembly or bulb identifiers, not broad descriptions such as “front light.”
Verify fitment before ordering replacement parts
Before checkout, compare the listing against the vehicle details and, where possible, the original part number. Confirm the side, connector style, mounting points, included bulbs or modules, and any stated restrictions. If the listing is unclear, pause and ask for confirmation rather than relying on a product photo.
A simple order check can catch common mismatches before they become a return or installation problem:
- Match the model year, trim, and body style to the listing.
- Confirm whether the part is for the left or right side.
- Compare the connector, mounting points, and original part number.
- Check whether bulbs, control modules, or other components are included.
Once those details agree, review the return conditions and keep the packaging until fitment is confirmed. Clear parts listing headlines can make shopping easier, but the specific compatibility details still need to match the vehicle.
Choose replacement headlights
A replacement can be a bulb, a complete assembly, or a component within a larger lighting system. The right choice depends on what has failed and what the vehicle’s original setup requires. Compare more than price: fit, beam quality, materials, and compatibility all affect whether the repair will be satisfactory.
OEM assemblies versus aftermarket options
An original-equipment assembly is designed for a specified application, while an aftermarket part may offer a different price or feature set. Neither label removes the need to verify the exact fitment and included components. Read the product description closely, especially when an assembly is sold without bulbs, modules, or other pieces needed for installation.
Ask what is included, what warranty applies, and whether the part is new or used. Those details help set expectations and make two listings easier to compare without assuming that a particular category is automatically the better choice.
Compare light output, beam pattern, and durability
A useful comparison looks at the beam on the road, not simply a brightness claim on a package. A beam should illuminate the driving area while keeping light controlled; lens clarity and the condition of the housing also affect the result. For a separate heavy-truck application, VNL and VNR LED options illustrate why a listing’s stated vehicle coverage and road-use details should be checked rather than inferred.
The same practical approach applies to any replacement: compare the specified application, beam design, material and warranty information. A brighter-sounding description is not a reliable substitute for a suitable beam pattern or a compatible assembly.
Check compatibility with adaptive lighting features
Some vehicles have lighting functions that move or adjust the beam, or use electronic modules as part of the headlight assembly. If the existing lamp includes such features, confirm that a replacement supports them and that any required components are supplied or transferable. A basic assembly that physically fits may not retain every function.
Before ordering, compare the feature list against the vehicle’s equipment and ask a supplier or qualified repairer about any uncertainty. Do not assume that the word “compatible” covers every lighting function unless the listing explicitly says so.
Replace a headlight bulb or assembly
A bulb change may be a straightforward service task on one vehicle and a more involved repair on another. Access can vary, and full assemblies may involve electrical connectors, fasteners, or calibration requirements. Use the vehicle’s service information as the authority for the procedure, and stop if access or wiring differs from what the instructions describe.
Prepare the vehicle and work area
Park on level ground, switch off the lights and ignition, and allow hot components to cool. Gather the specified replacement part and tools before starting, and protect the lens and nearby painted surfaces from scratches. If the procedure calls for disconnecting power or handling a module, follow the manufacturer’s safety instructions.
A repair guide or demonstration can help you understand the general sequence, but it cannot replace model-specific instructions. This video placeholder is included as a visual aid for the topic, not as a substitute for the vehicle’s service manual.
Follow model-specific access and removal steps
Check the service instructions for how to reach the bulb or assembly; some vehicles require access from the engine bay, while others involve removing covers or nearby components. Release connectors and fasteners as directed, and avoid pulling on wiring. If a bulb type requires careful handling, follow its instructions and do not touch the glass where prohibited.
For a complete assembly, keep track of each fastener and connector and compare the replacement with the removed unit before installation. If the parts do not match, stop and recheck the part number and fitment rather than forcing a connector or mount into place.
Aim and test the lights after installation
After fitting the part, check that it is secure and that connectors are fully seated. Test the low beams, high beams, turn signals, and any other functions included in the assembly. A lamp that illuminates is not necessarily aimed correctly, so check the beam against a suitable flat surface or have alignment verified professionally.
If the beam appears unusually high, low, or uneven, avoid assuming that the adjustment is minor; misalignment can reduce visibility or distract other road users. Some replacements or repairs may require a vehicle-specific setup procedure, so consult a qualified technician when needed.
Consider an LED headlight upgrade
An LED upgrade can mean replacing a bulb in an existing housing or changing the complete headlight assembly. Those are different jobs, with different compatibility and approval questions. Before buying anything, establish which type of upgrade is being proposed and whether it is appropriate for the existing lamp and local road rules.
Confirm whether the housing supports the bulb type
A bulb that fits into a socket may still be unsuitable for the optic designed around another light source. The position and shape of the source influence the beam, so a physical fit alone does not establish safe optical performance. Check the housing and bulb maker’s compatibility information, and avoid modifications that leave the beam scattered or poorly controlled.
If the original assembly is designed for an integrated light source, replacing only a bulb may not be an option. In that case, confirm whether a complete replacement assembly is offered for the vehicle and whether it retains required functions.
Check local requirements and road-use approval
Lighting requirements vary by jurisdiction, and approval may depend on the lamp, bulb, vehicle, and intended road use. Look for documentation that applies to the complete setup rather than relying on a general claim that an LED product is “road legal.” When details are unclear, check with the relevant local authority or a qualified inspection professional before installation.
Keep the product documentation and make sure the final installation follows applicable rules. A technically compatible component is not necessarily approved for every road-use situation.
Avoid glare with proper beam alignment
A good upgrade should preserve a controlled beam rather than send extra light above the intended cutoff. After installation, check the aim and observe the beam pattern on a level surface; seek professional adjustment if the cutoff is uneven or the lamps point too high. Alignment matters even when the replacement assembly is marketed for the vehicle.
If other drivers flash their lights or the beam seems to strike signs and upper surfaces excessively, treat that as a reason to recheck the setup. Do not try to compensate for a poor beam by aiming the headlamps lower without confirming the correct adjustment procedure.
Troubleshoot common headlight problems
A headlight that fails, dims, or changes brightness can have several causes, from a worn bulb to a poor connection or a problem in the vehicle’s electrical system. Look for patterns: one lamp failing is different from both lamps dimming together. A careful initial check can help determine whether the issue is a simple replacement or needs diagnosis by a professional.
Diagnose a burned-out bulb or failed LED
If one side stops working, first identify whether the vehicle uses a replaceable bulb or an integrated LED assembly. Consult the owner’s manual or service information, then inspect the relevant fuse or bulb only as directed. An integrated unit may require assembly-level diagnosis rather than a bulb swap.
If the replacement part fails to illuminate, check that it is the correct type and that the connector is seated, but do not repeatedly cycle a faulty component. Persistent failure, warning messages, or visible damage are good reasons to seek professional testing.
Check for flickering, dimming, or electrical faults
Flickering can point to a loose connection, a failing component, or an electrical fault; dimming on both sides may suggest a broader issue than a single bulb. Note when the symptom occurs, whether it affects one or both lamps, and whether a dashboard warning appears. This information can help a repairer narrow down the cause.
Avoid probing unfamiliar wiring or bypassing a fuse with a higher-rated one. If a connection is hot, damaged, or smells burnt, switch the lights off and arrange an inspection rather than continuing to use the system.
Address condensation, cloudy lenses, or damaged housings
A small amount of temporary moisture can sometimes appear after a change in temperature, but persistent droplets, standing water, or recurring fogging merit an inspection. Check for cracks, damaged seals, or a loose cover. Cloudy outer lenses can also reduce light output, while a broken housing may let moisture reach electrical parts.
Do not seal a lamp with an unapproved product or ignore water inside the assembly. If cleaning and inspection do not resolve the problem, a repairer can determine whether the lens, seal, or complete unit needs attention.
Maintain headlights for safe visibility
Headlights work best when their lenses are clear, the assemblies are secure, and the beams point where intended. A quick visual check during routine vehicle care can catch dirt, cracks, or a lamp that has gone out. These small checks are useful, but they do not replace professional inspection if a light behaves unusually.
Clean and protect the lenses
Wash the lens with automotive-safe soap and a soft cloth, rinsing away grit before wiping to reduce the risk of scratches. Avoid harsh solvents and abrasive pads unless the product instructions specifically permit them. If a lens is already cloudy, use a restoration product suited to automotive headlamps and follow its directions.
A protective coating may help preserve a restored surface when it is made for that purpose. Recheck the lens after cleaning; persistent haze or damage may need a more thorough repair or replacement.
Inspect seals, connectors, and mounting points
Look for visible cracks, loose covers, corrosion, or connectors that appear damaged. Check that the assembly does not move when gently inspected and that its mounting points are intact. If a seal looks compromised or moisture keeps returning, have the unit examined before the issue affects its electronics.
Keep the inspection visual unless the service instructions call for more. Avoid tugging on wiring or opening a sealed assembly without the right procedure and tools.
Check beam alignment and lighting performance
Periodically confirm that both lamps illuminate and that their color and brightness appear consistent. Check alignment after a collision, suspension work, or headlight replacement, since those changes can affect where the beams land. A professional adjustment is sensible when the pattern is uneven or the correct aim is uncertain.
Regular checks help keep the road ahead visible and reduce the chance that a misdirected beam bothers other drivers. If performance changes suddenly, investigate the cause rather than waiting for the next routine service.
Conclusion
A suitable headlight replacement begins with accurate vehicle and part details, then depends on matching the original system, checking the beam, and installing it according to the correct procedure. Take time to verify fitment and local requirements, and seek qualified help when a repair involves unfamiliar wiring, adaptive features, or uncertain alignment.
Frequently Asked Questions
Can I replace a headlight bulb myself?
That depends on the vehicle’s design and the access required. Consult the owner’s manual or service instructions first, and seek help if the procedure involves unfamiliar electrical components or extensive disassembly.
How do I know which headlight bulb fits my car?
Use the owner’s manual, the existing bulb or assembly markings, and a fitment listing that matches the vehicle’s year, trim, and body style. Confirm the part number when possible before ordering.
Can I put an LED bulb in a halogen housing?
Physical fit does not guarantee that an LED bulb will work properly with a housing designed for another source. Check compatibility, beam performance, and local road-use requirements before making a change.
Should I replace both headlight bulbs at once?
Replacing bulbs in pairs can help maintain similar light output when both are the same age, but it is not always necessary. Follow the vehicle’s guidance and compare the condition of both sides.
Why is one headlight dimmer than the other?
Possible causes include a worn bulb, a cloudy lens, a poor connection, or a fault in the electrical system. Compare the lamps and have persistent or unexplained differences diagnosed.
Is condensation inside a headlight normal?
Brief light fogging may clear as conditions change, but persistent moisture, droplets, or standing water should be checked. Damaged seals or a cracked housing may need repair.
Do headlights need to be aimed after replacement?
Yes, alignment should be checked after a replacement because even a properly fitted lamp can point incorrectly. Use the specified procedure or have a qualified professional set the beam.